

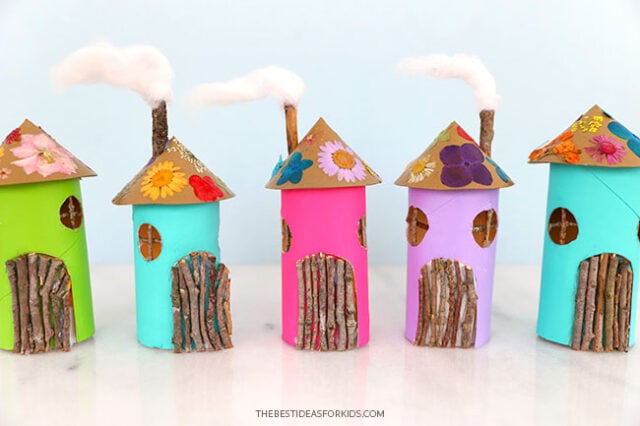
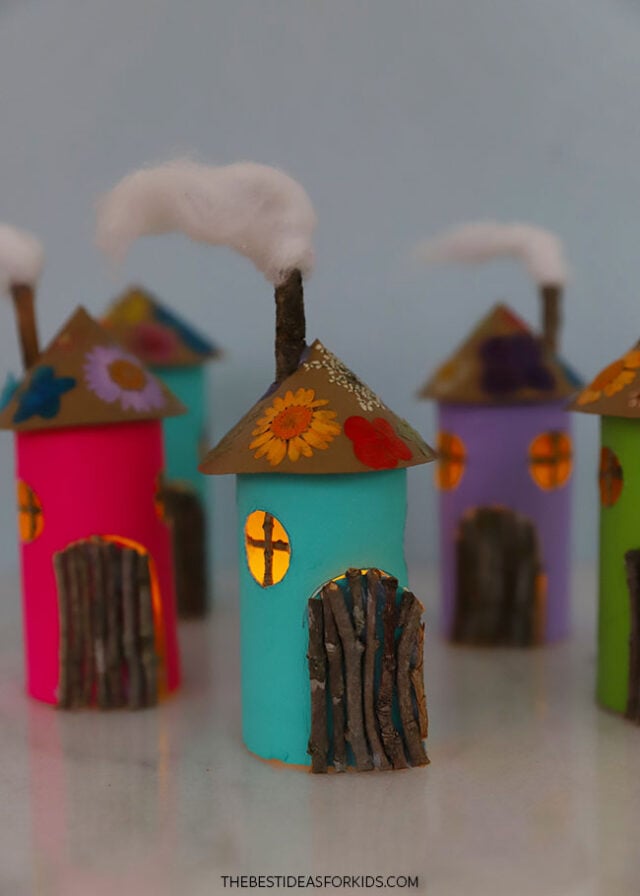
Save your paper rolls and turn them into an adorable toilet paper roll fairy house! This is a fun summer activity where you can collect the nature supplies and then create the fairy houses after you’re done.
RELATED: Pine Cone Fairy
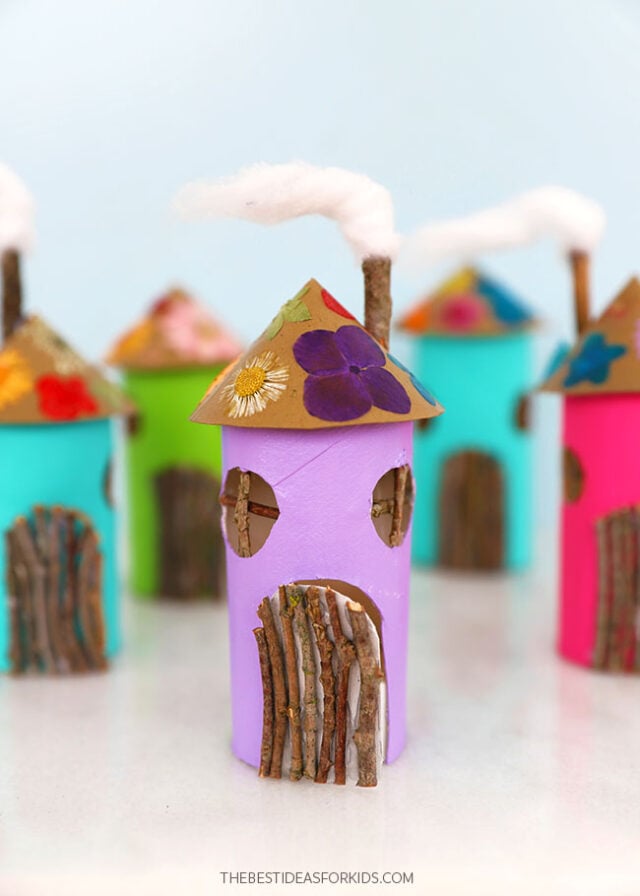
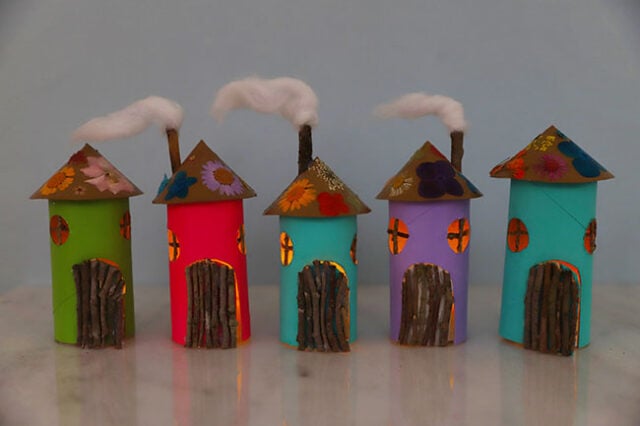
Toilet Paper Roll Fairy Houses
Gather sticks and twigs from your yard or local park to use for the window and door details. Pick a variety of thin and medium-sized sticks for this project. If it has rained recently, make sure the sticks are completely dry before you craft with them.
And if you love recycled crafts, see our recycled crafts for kids book.
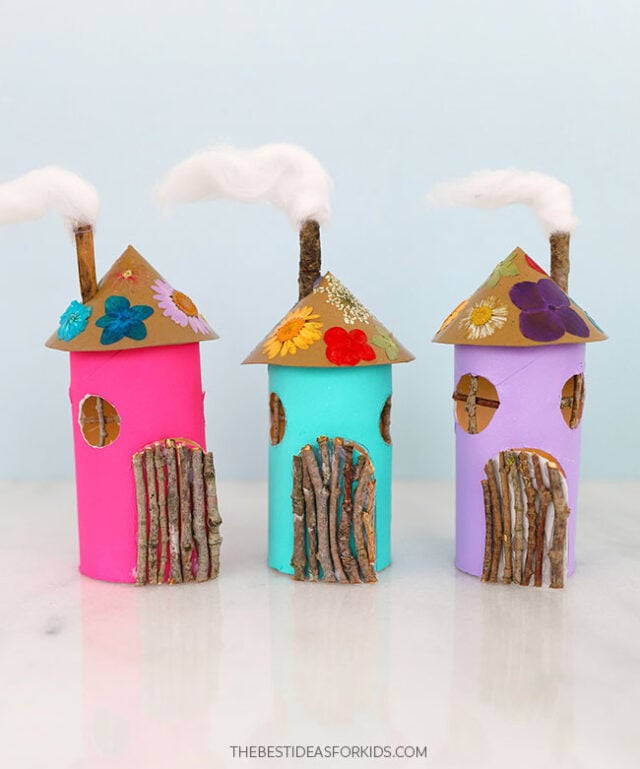
We also decorated the roofs with pressed flowers. If you have your own collection of flowers that you’ve pressed yourself, this is a great project for showcasing them. If not, you can also buy pressed flowers that are ready to use online.
To press your own flowers, see our tutorial on how to press flowers.
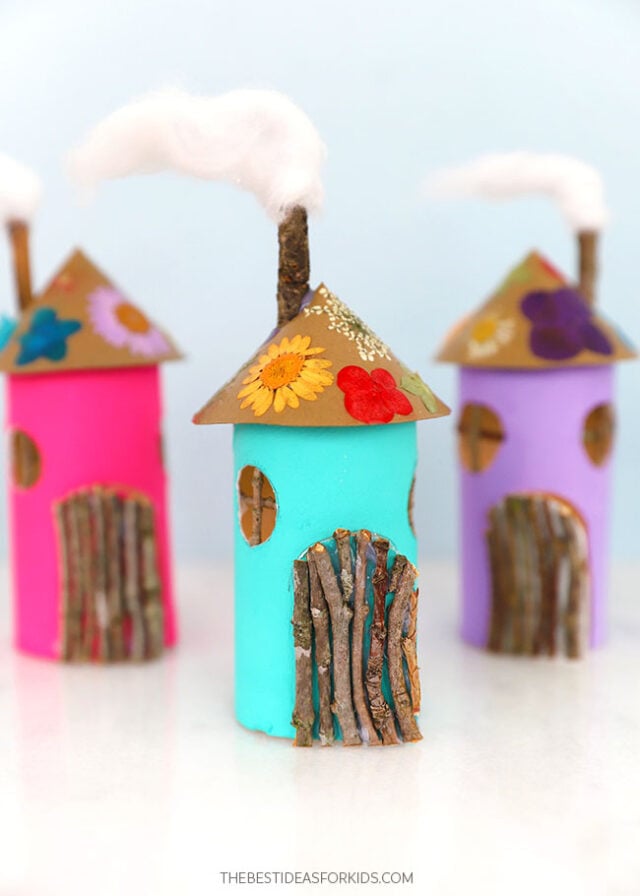
The chimney is made with a stick, pipe cleaner, and part of a cotton ball. The cotton ball makes the perfect wispy smoke. We love how whimsical the chimney smoke makes the fairy house!
Supplies Needed
- Paper rolls – you can use toilet paper rolls or cut down a paper towel roll to the same size
- Paint – bright acrylic colors for the house exteriors
- Paintbrushes – medium-sized
- Sticks – very thin for the window details, thin to medium for the doors, medium-sized for the chimney
- Pressed flowers – to decorate the roof. You can press your own or buy pressed flowers.
- Mod Podge – to seal the pressed flowers
- Brown Kraft Cardstock – for the roofs
- Scissors
- Pipe cleaner – white, to make the smoke
- Cotton ball – to make the smoke
- Hot glue gun – used with adult assistance
- Tacky glue – optional
- Battery-operated tealight candle – optional if you want them to light up
Add a battery-operated tealight candle inside them and they will light up in the dark!
Watch the Video Tutorial
How to Make Toilet Paper Roll Fairy Houses
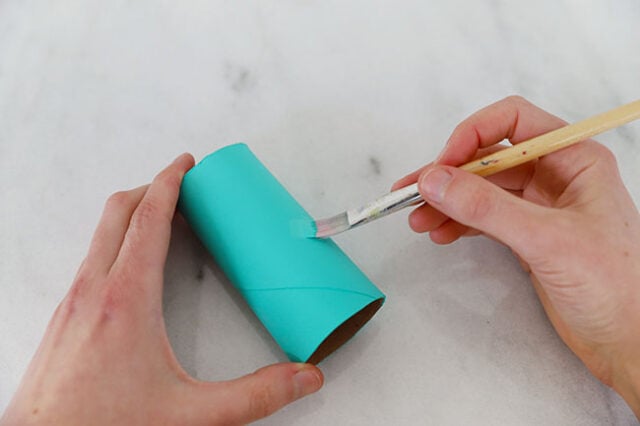
1. Paint the paper rolls.
Apply a coat of paint to the outside of the paper rolls and set aside to dry completely.
Tip
If your paper rolls are brown paper, it can help to paint the rolls white first, let them dry, and then paint the bright color. This will help with coverage and will make the final color more vibrant.
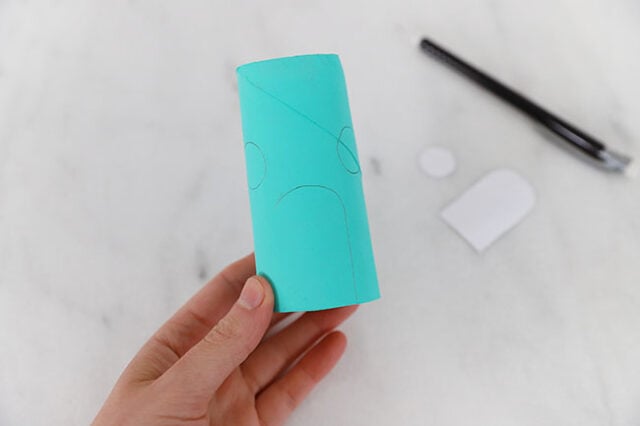
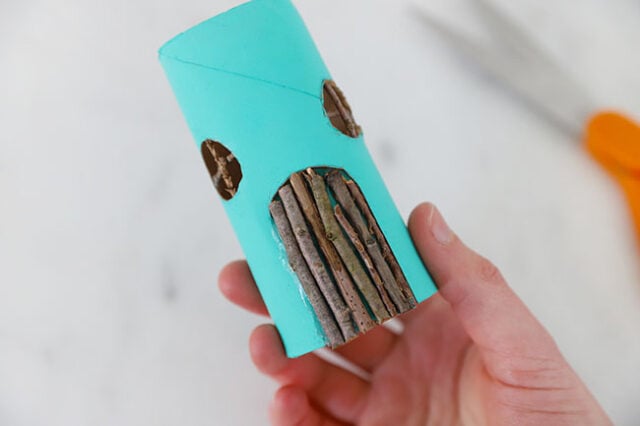
2. Make the windows and doors.
Print and cut out the window and door templates, and then trace them onto the painted paper rolls.
Use scissors to trim the door, but do not cut the left side of the door – this will allow you to fold the door open.
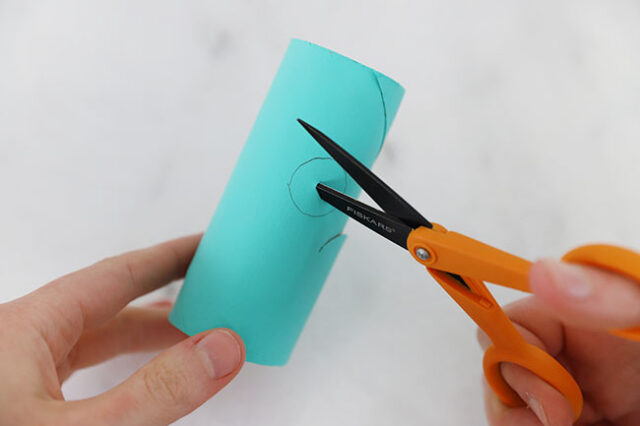
Use the sharp point of a pair of scissors to poke into the window hole. Adults may need to assist with the cutting.
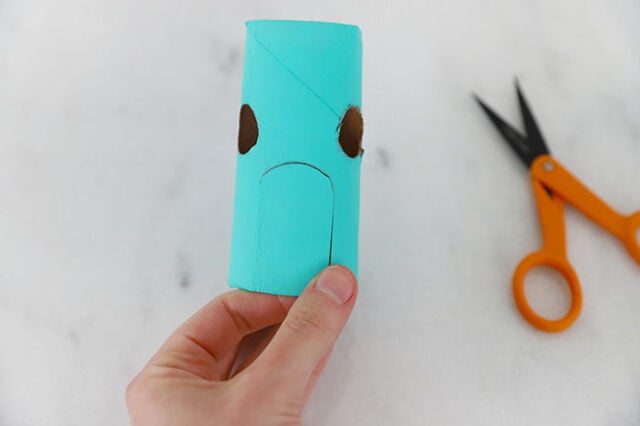
Once the hole is poked through, cut out both of the windows.
3. Add the window details.
Cut a thin stick into 4 pieces, each about 3/4″ long.
With adult assistance, carefully apply a small dab of hot glue to each end of the stick and then press into the inside of the paper roll so that it forms a vertical line down the center of the window.
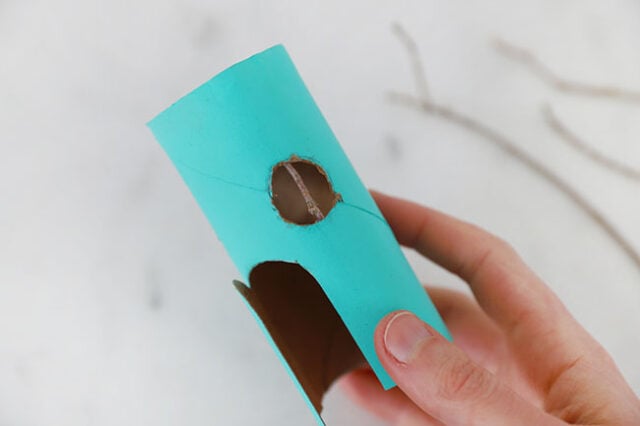
Do the same for the second piece, but this time glue it horizontally on the same window.
Repeat for the second window.

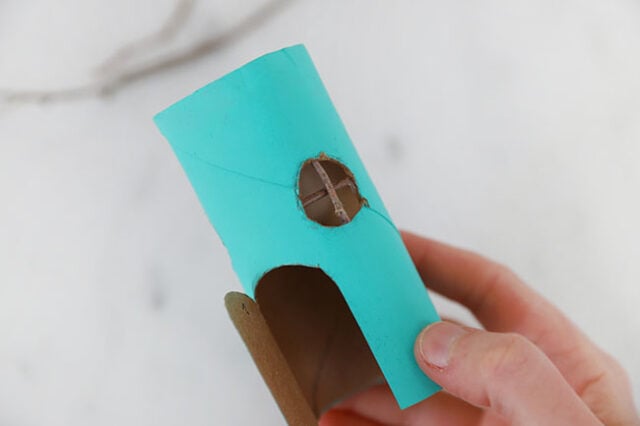
4. Make the door.
With adult assistance, apply a thin line of hot glue down the left side of the door, right beside the fold.
Place a thin to medium-sized stick (one that you can cut through with a pair of scissors) onto the hot glue and press to secure. Line up one end of the stick with the top edge of the door – don’t worry about the bottom edge yet, you’ll trim them later.
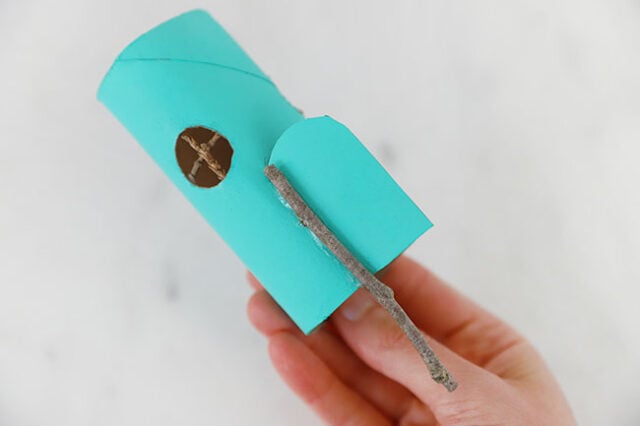
Repeat this process across the entire door.
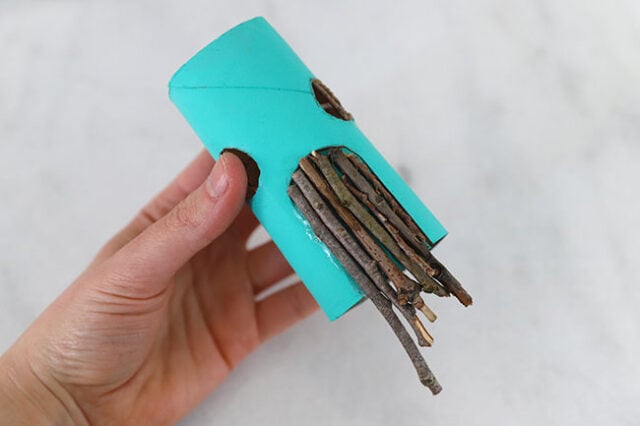
Use scissors to trim along the bottom edge.
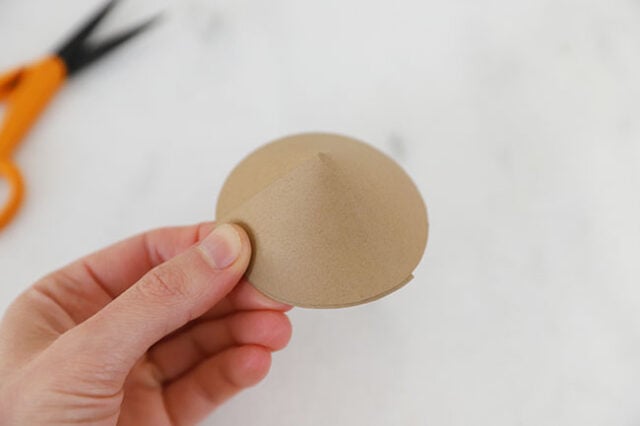
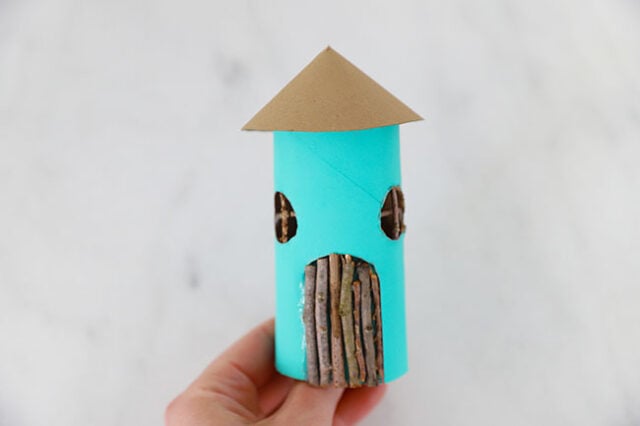
5. Make the roof.
Print and cut out the roof template and trace it onto brown kraft cardstock. Cut it out and glue it together in the shape of a cone. See the shape below.
If you want your fairy house to be shorter than the height of the paper roll, use scissors to trim away some of the top edge of the paper roll.
Apply some hot glue to the top edge of the paper roll and place the roof on top, pressing to secure in place.
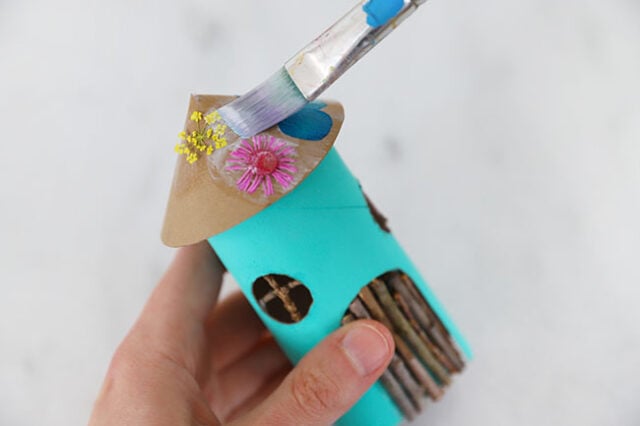
Apply a coat of Mod Podge onto the roof and place pressed flowers onto it.
Seal the flowers with another coat of Mod Podge. When the entire roof is covered, set aside to dry.
If you do not have pressed flowers you can also paint the roof a different color or use colored cardstock.
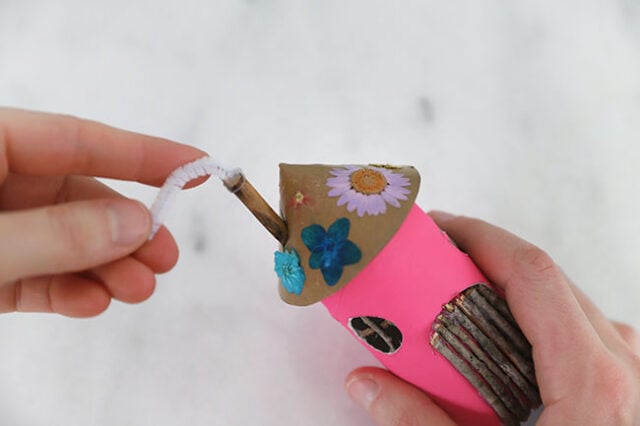
6. Add a chimney.
Cut a medium stick to a piece about 3″ long. Cut the bottom on an angle to match the angle of the roof and hot glue to the top of the roof. If it is a bit too wiggly, make a hole in the roof and glue to the hole.

Cut a 1 1/2″ piece of white pipe cleaner and with adult assistance, hot glue one end to the end of the chimney.
Shape the pipe cleaner to give it a gentle bend, like smoke blowing in the breeze.
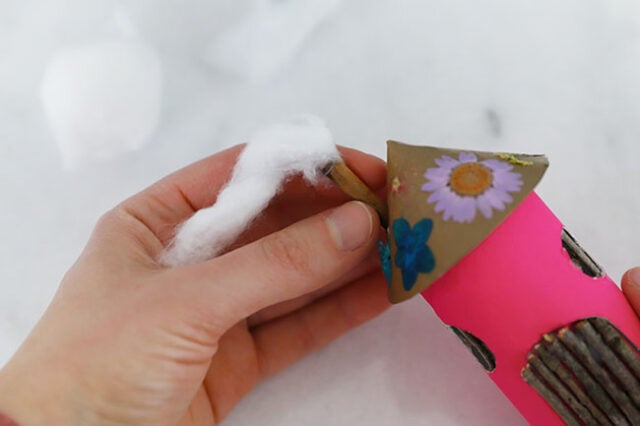
Tear off a strip of the cotton ball and wrap it around the pipe cleaner, forming the chimney smoke.
The cotton ball will naturally cling to the pipe cleaner, but you can use a few dabs of tacky glue or hot glue to glue it on.
Make as many fairy houses as you’d like, in as many colors!
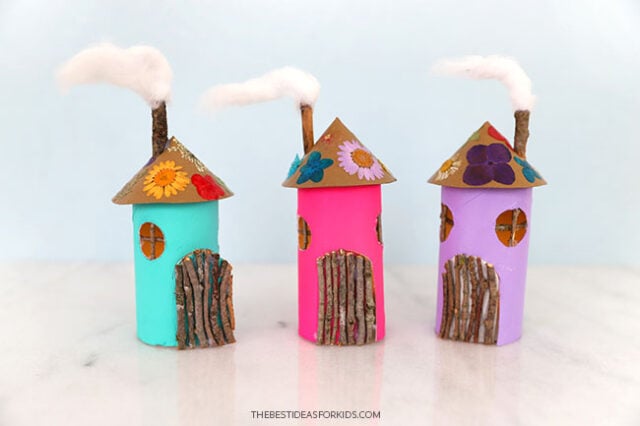
You can add a battery-operated tealight candle inside them and the windows light up! These would look adorable along a window ledge or shelf.


Share a Comment!
We LOVE hearing from you! Submit your question or comment here.
Your email address will not be published.
Required fields are marked *