Salt dough ornaments are the perfect Christmas craft and activity to do with your kids. Make them to give as gifts or simply to hang on your own tree. This is the BEST salt dough ornament recipe.
RELATED: Salt Dough Recipe

How to Make Salt Dough Ornaments
The best part about making salt dough is it’s easy! And you typically already have the ingredients on hand – salt, flour and water.
Don’t worry if you don’t have the decoration supplies just yet. Make your batch of salt dough, bake and then let them air dry for a few days before decorating.
Just a friendly reminder that salt dough can be dangerous to pets if ingested – please keep out of reach of pets.
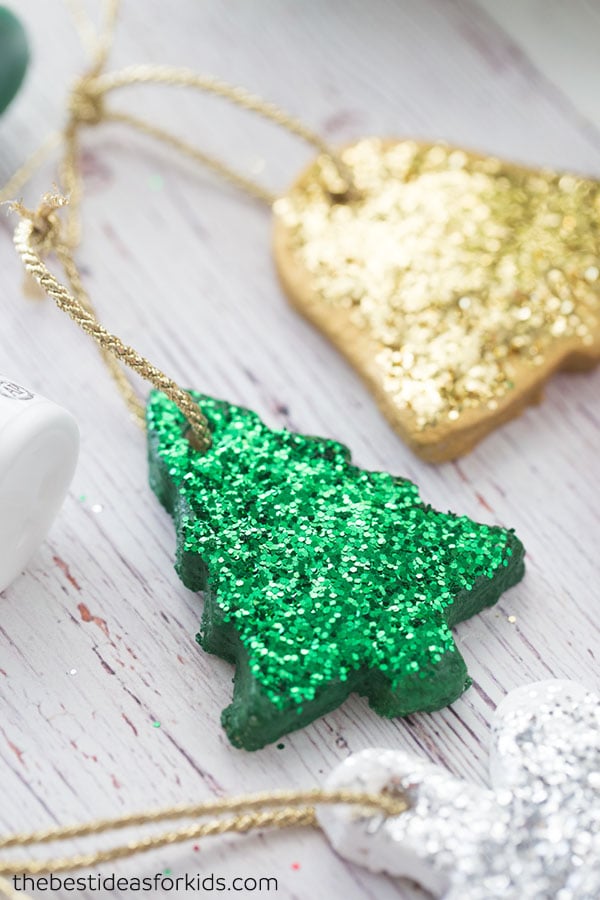
We’re going to show you how to make these glittery salt dough ornaments. Your Christmas tree will be glistening with these homemade ornaments!
Ingredients Needed to Make Salt Dough Ornaments
- 4 cups Flour
- 1 cup Salt
- 1.5 cups Water (maybe a little more)

How to Make Salt Dough Ornaments – an Easy Recipe
1. Preheat your oven to 200 degrees Fahrenheit.
Note: Check what temperature your oven setting is. If your oven temperature is Celsius you will need to bake at a much lower temperature (the lowest setting is usually a good one to start with).
Adults will need to do the baking part, but kids can help decorate!
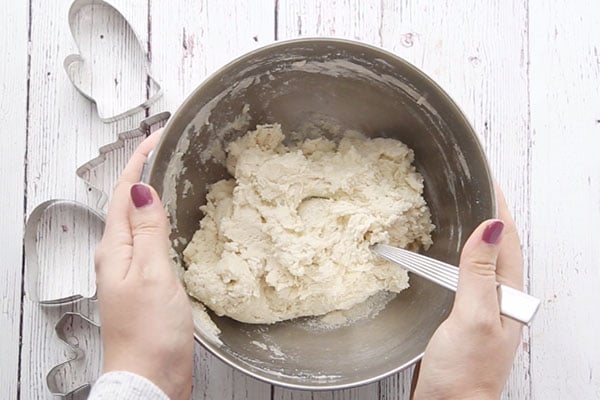
2. Combine your flour, salt and water and mix well. Knead for 10 minutes. If your dough is too dry, add a little bit more water. If it’s too sticky, add a little bit of flour. It will help to place flour down on your surface when kneading and on your hands.
Keep kneading until the dough becomes really smooth. This takes about 10 minutes.
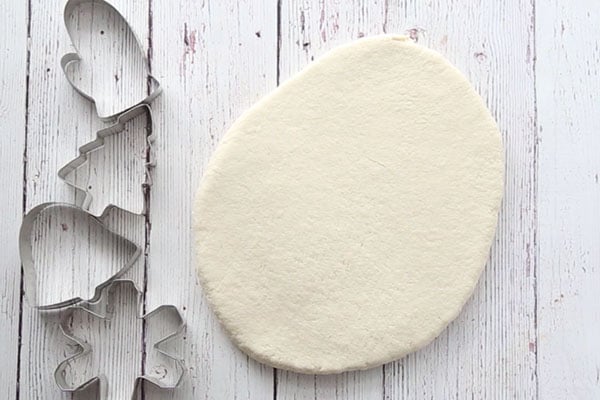
3. Once you’re done kneading, roll out the dough to about 1/2 cm thickness.
The thinner you make the ornaments, the better they will thoroughly bake and dry through. If you make them too thick they will take too long to dry.
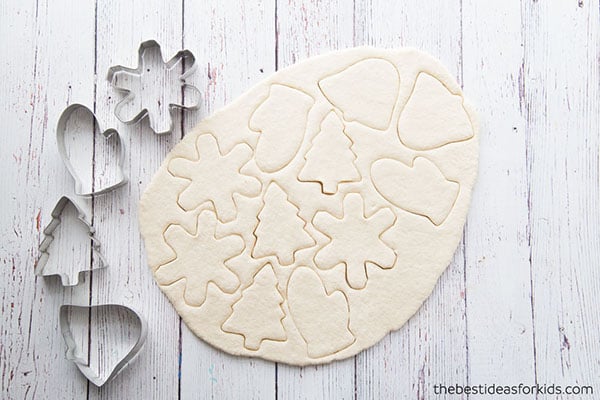
4. Using your Christmas cookie cutters, cut out different shapes for your salt dough ornaments.
5. Using a straw, make a hole in the top of the ornament for where you would like the twine to hang.
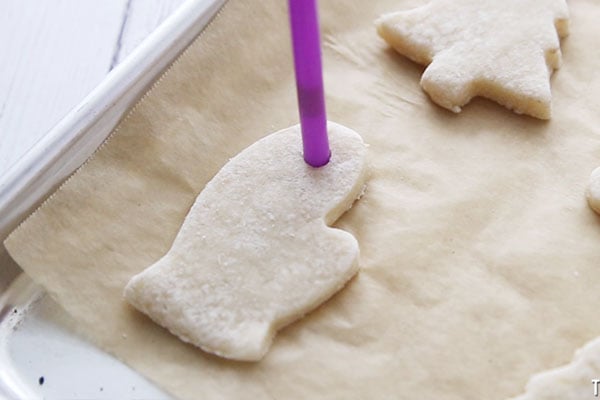
6. For a faster baking process, we like to let the dough air dry for a day.
Bake for 1-2 hours. If your ornaments are not completely dried through when you pull them out put back in for another hour. The baking time will vary greatly depending on the size and thickness of your ornaments. Larger ornaments will take longer whereas smaller ornaments will take less time. You can also let them air dry for a day before baking and this will cut down on the baking time.
Make sure to flip them when air drying or baking so that the bottoms of the ornaments dry also.
Note: If you notice puffing when baking, it is likely because the ornaments are too thick. In this case, let them air dry for a few days before baking and make sure they are baking at a low temperature for your oven (200 degrees Fahrenheit).

7. Once cool and completely dried, paint with non-toxic acrylic paint. We used white for the snowflake, red for the mitten, green for the Christmas tree and gold for the bell.

8. Before adding the glitter, you’ll need to seal the ornaments. This will help them keep longer. Make sure your ornaments are completely dried through before sealing. Spray with a clear glaze spray (adults only) or finish with mod podge.
9. Now add clear glue on top of your ornament. Shake glitter on top until you fill the ornament with glitter. Kids will love helping with this part!
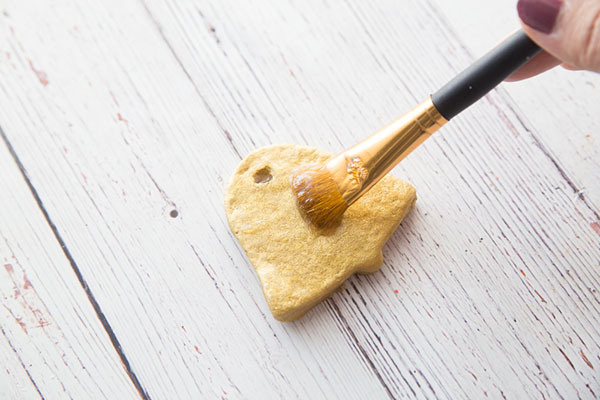
Once you’re done, add your gold twine for hanging them on the tree.

Storage Tip: Keep in a cool, dry place when not in use.

Salt Dough Ornament Recipe
Video
Equipment
- Clear Glaze Spray (or Mod-Podge)
Ingredients
- 4 cups flour
- 1 cup salt
- 1.5 cups water *Maybe a little more water needed once kneaded.
Instructions
- Preheat your oven to 200 degrees Fahrenheit. Important: Check what temperature your oven setting is. If your oven temperature is Celsius you will need to bake at a much lower temperature (the lowest setting is usually a good one to start with). Adults will need to do the baking part, but kids can help decorate!
- Combine your flour, salt and water and mix well. Knead for 10 minutes. If your dough is too dry, add a little bit more water. If it's too sticky, add a little bit of flour. It will help to place flour down on your surface when kneading and on your hands.Keep kneading until the dough becomes really smooth. This takes about 10 minutes.
- Once you're done kneading, roll out the dough to about 1/2 cm thickness. The thinner you make the ornaments, the better they will thoroughly bake and dry through. If you make them too thick they will take too long to dry.
- Using your Christmas cookie cutters, cut out different shapes for your salt dough ornaments.
- Using a straw, make a hole in the top of the ornament for where you would like the twine to hang.
- For a faster baking process, we like to let the dough air dry for a day. Bake for 1-2 hours. If your ornaments are not completely dried through when you pull them out put back in for another hour. The baking time will vary greatly depending on the size and thickness of your ornaments. Larger ornaments will take longer whereas smaller ornaments will take less time.Make sure to flip them when air drying or baking so that the bottoms of the ornaments dry also.
- Once cool and completely dried, paint with non-toxic acrylic paint. We used white for the snowflake, red for the mitten, green for the Christmas tree and gold for the bell.
- Before adding the glitter, you'll need to seal the ornaments. This will help them keep longer. Make sure your ornaments are completely dried through before sealing. Spray with a clear glaze spray (adults only) or finish with mod podge.
- Now add clear glue on top of your ornament and shake glitter on top until you fill the ornament with glitter.
Notes
These have to be our favorite salt dough ornaments we’ve made and they look great on the Christmas tree!
Looking for more fun Salt Dough Ideas?
See over 25+ Salt Dough Ornament Ideas – these are such cute keepsakes!
These Salt Dough Handprint ornaments are our most popular salt dough ornament. See how to make these adorable handprint keepsakes!

And for another ornament idea – make these salt dough star ornaments. These look great with the bell added!






What do I use for sealer and when? When do I use modge podge? Plan to make glitter ones. Does the modge posge need to be spray? Thanks!
Hi! I just made these and had to cook them for a couple of hours and they seem to still be a little soft in the Center? What should I do? Bake again more or leave them to air dry to dry out or use a food dehydrator?? Thanks!
Increase the temperature by 50 degrees Fahrenheit and put back in for 30-60 minutes. Watch closely that puffing doesn’t occur. If they are still soft, let them air dry for 24 hours and see how they are after that. Make sure it’s on a cookie drying rack so that the air can get to the bottom.
Is there a printer friendly version of this? Too long to print!! And I’m not techy enough to bring computer into kitchen.
Shannon up above you’ll see the recipe card you can print only the recipe portion. Hope that helps!
ours took over 5 hours in the over plus sat overnight. less than 1/2 inch thick too but very cute!
If I can push on the back of the ornament would I need to cook longer?
It should be firm when you take it out so I would put back in for a bit longer and then let it air dry.
Hi. I would like to make one of the ornaments with a Christmas tree cut out then put the glitter on then a picture of my daughter. Would that work?
I’m not sure you could glue on a picture on top of glitter but you could glue on a picture then add mod podge on top and then glitter around it.
How far in advance can you make the dough?
We recommend making before you plan on doing it, but if you have to make in advance you can try putting in the fridge just make sure you let it sit at room temperature to warm up after taking it out as it will be hard.
Can you wait to seal it after applying the glitter (so that the glitter doesn’t fall off and get everywhere), or does it need to be sealed before the glitter and glue?
Seal before the glitter if you can as that would be extra coverage and then you can seal (if using spray seal) on top of the glitter too.
How many ornaments does the recipe make?
Depending on your size of cookie cutters and thickness it should yield 12-15 small size ornaments (about 3 inches tall).
All purpose flour or self rising? Or does that matter?
All purpose flour 🙂
Is baking absolutely necessary?
It is recommended but we have heard you can let it air dry in some dryer climates. You can definitely try it and let us know how it goes!
how many ornaments should this recipe yield?
Depending on your size of cookie cutters and thickness it should yield 12-15 small size ornaments (about 3 inches tall).
can you add cinnamon to dough for scent and color?
We haven’t tried that Laurie but I’m sure a little cinnamon wouldn’t hurt! 🙂
I have been making these for 3 years now. Adding cinnamon to the mix makes for an amazing new look and continuous smell even after 3 years
What is mod podge where do you get it
You can order it online (link is above for Amazon) or you can get it at Michaels or any craft store.
Will it last for years??
As long as you seal them they will last for years. We link to our recommended sealers in the post above. 🙂
After you apply the mod podge, do you have to let it dry before you put the clear glue On?
And, could you just use glitter glue?
Yes let the mod podge fully dry before applying the glue on top. You could try using glitter glue but it won’t be as much glitter. 🙂
Do you think covering the finished product with clear glaze spray would be OK?
Yes that should be fine.
Shouldn’t you spray again after the glitter/glue goes on and dries
The seal/spray is to keep the moisture out of the ornament so it’s not necessary to spray after for the glue and glitter but if you’d like to you can.
What do you use to print a name and date on them?
An oil based paint marker would probably be your best bet.
Would writing name of the child and date with a permanent marker work as well?
That should be fine Maria just make sure you seal over top.
If it’s completely hard does that mean that it’s completely dry.
Yes 🙂