Learn how to make your own salt dough for handprints or ornaments with this easy salt dough recipe. You only need a few ingredients from your kitchen to make this salt dough! We cover all of the necessary tips and tricks to make these handprint ornaments.
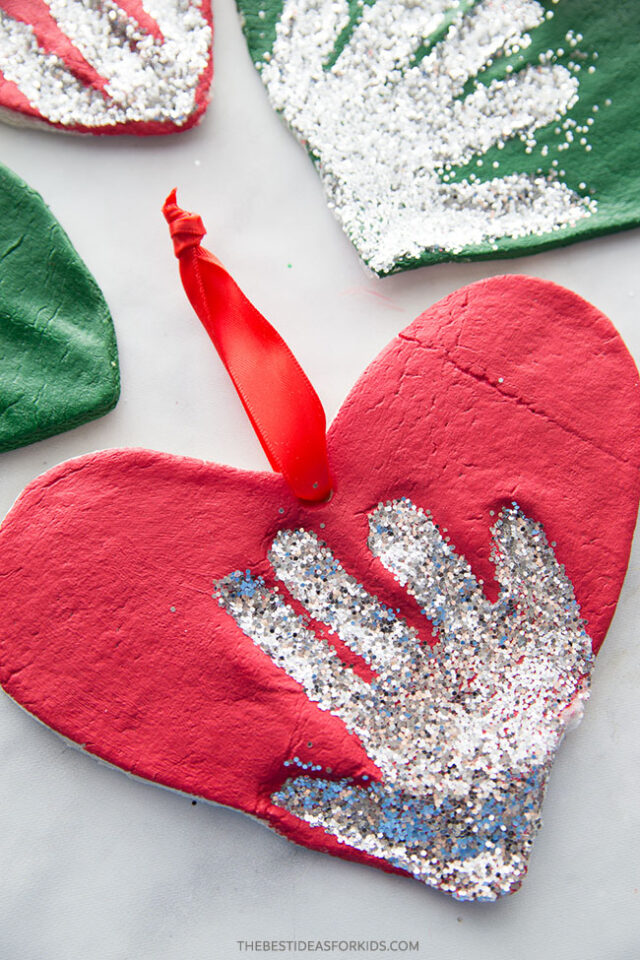
One of our favorite things to do with this salt dough recipe is to make handprint ornaments. But you can also use this same salt dough recipe and use cookie cutters and paint shapes instead!
Don’t forget to add the year on the back of the salt dough ornament to keep track of the different years.
Note: reminder to keep out of reach of pets.
Ingredients
- 4 cups all purpose flour (Note: you want regular all purpose flour, not self-rising)
- 1 cup salt
- 1.5 cups warm water
Watch the Video Tutorial
How to Make Salt Dough
1. Combine all of your ingredients (flour, salt, warm water) and mix well until it starts to form a dough.
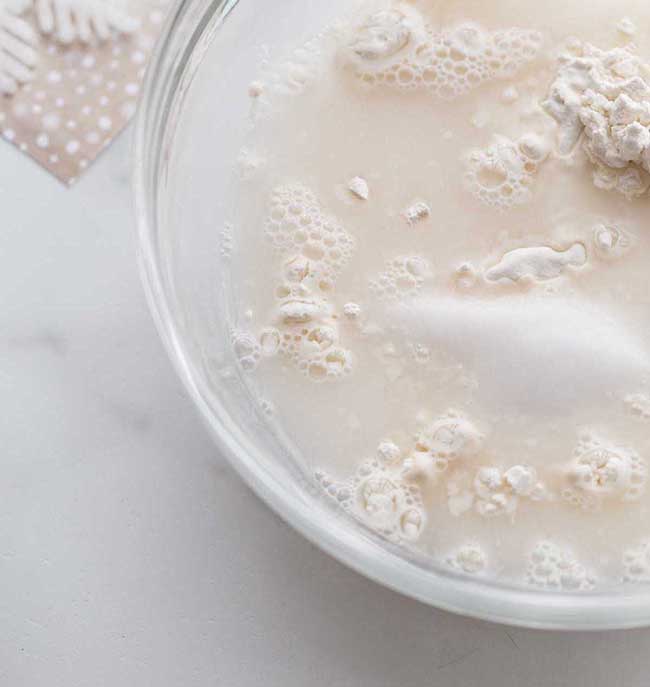
2. Take the dough out of the bowl and knead for at least 10 minutes.
The dough will likely be a bit on the dry side to start. If it is, add a little more water in (about 1 tablespoon at a time). Then continue to knead.
The dough should be smooth and roll out with not too many bumps. It should also be easy to press a handprint into it. If you’re finding it’s too hard or not smooth enough, continue to knead some more. If it’s still too dry, add a little bit more water (about a few tablespoons at a time -but not too much or it may get too wet).
Roll out the dough to between 1/4 to 1/2 inch thickness. If the dough is too thick it will take too long to dry.
Press the hand into the dough.
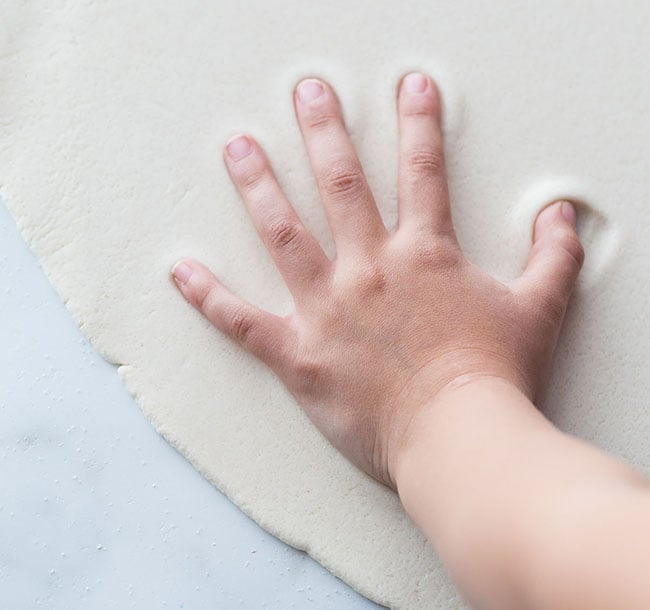
3. Use a circle shaped bowl to trace around your handprint.
Cut out the handprint with a knife (adults to do this part).
You can also print off a circle shape or heart shape to trace around with a knife (adults to do this part).
If you have a smaller handprint you can use a circle or large heart cookie cutter.
TIP: It’s easier to press the handprint first, and then trace around it. If you have dough left over you can roll it out again and do another handprint.
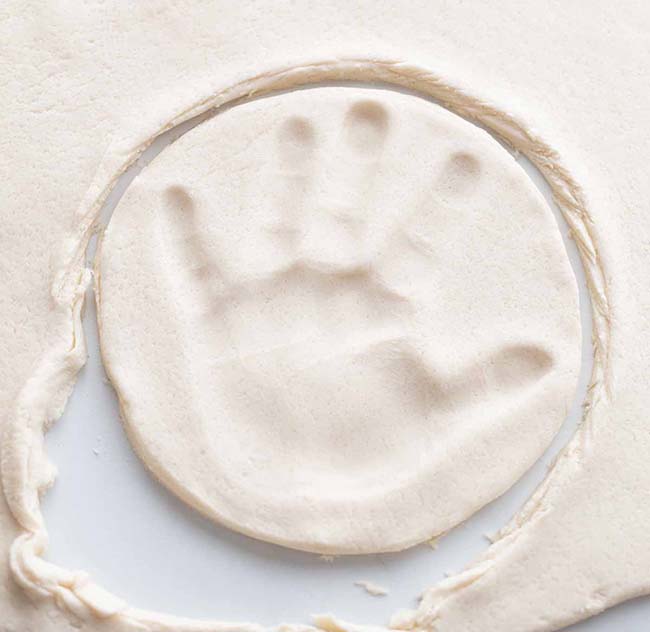
4. Using a straw, make a hole in the top of the ornament.
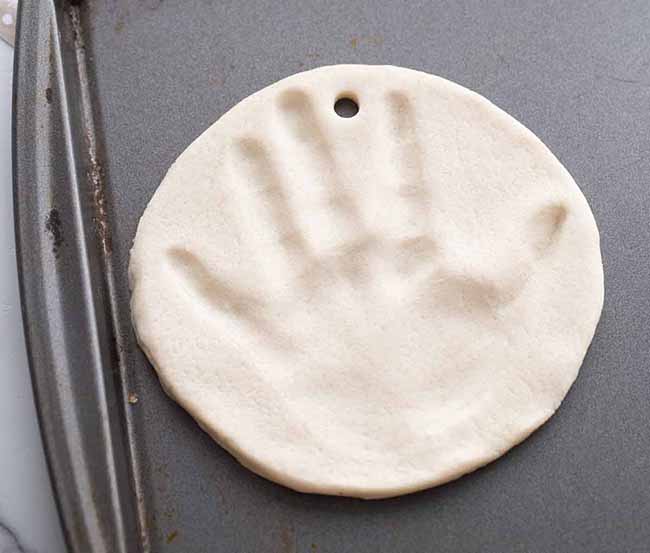
5. Let the ornaments air dry for a day.
If you have time, let the ornaments air dry for a day. This will cut down on the baking time required and help to prevent puffing. If you do not have time, you can bake right away instead.
Bake at 250 degrees Fahrenheit for 1-2 hours. Once the top of the ornaments look dry and solid, flip over and bake on the other side.
NOTE: It’s important that you check that your oven temperature is set to Fahrenheit. One of the most common reasons the ornaments burn and puff up is that the oven temperature is Celsius. If you have a Celsius setting then you’ll want to use the lowest oven temperature, closer to 120 degrees Celsius.
If your ornaments are still doughy, put them back in for another hour. It will depend on your thickness how long you need to bake for. The thinner ornaments will take less time but thicker may take more. If it’s taking too long in the oven, let them finish drying by air drying them for a few more days. Make sure to flip them over so the bottoms also get exposed to air.
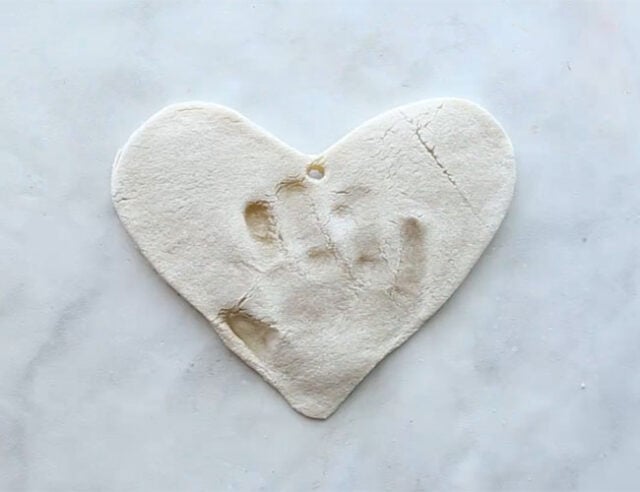
6. Once your ornaments are fully dry you can paint them.
Paint the handprint and leave the remaining ornament plain. Or you can paint the whole ornament white and then paint the center handprint once the base coat has dried.
If you want to add glitter into the handprint, decorate the whole ornament with paint first, then fill the handprint with glue. Shake glitter onto the glue.
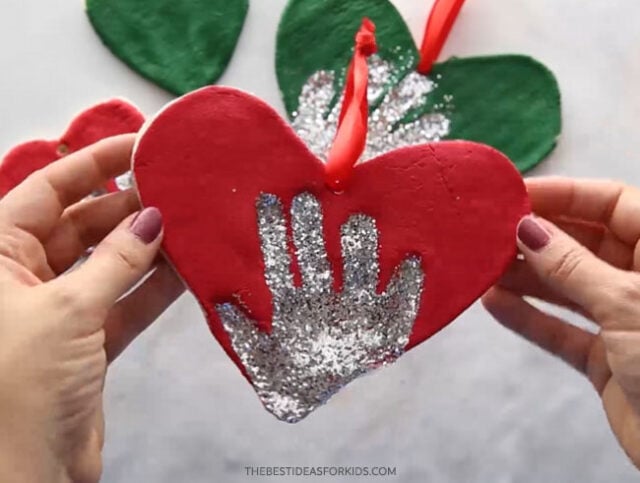
After the paint has dried, make sure to seal with with either mod podge or a clear glaze spray. Seal the ornaments after you paint them and the paint has fully dried.
7. Tie ribbon or twine through the hole for hanging on the Christmas tree.
Why Is My Salt Dough Puffing Up?
The number one reason salt dough is puffing is due to the oven temperature. If the temperature is too high the salt dough will puff up. It is better to let your ornaments air dry for a day and then bake them. This will prevent the puffing. If you need to bake right away, bake at the lowest temperature (200-250 degrees Fahrenheit).
Note: Make sure to check your oven temperature is Fahrenheit and not Celsius.
You also want to make sure you are using regular, all purpose flour and not self-rising flour.
How Do I Seal?
Once you are done, don’t forget to seal with either mod podge or a clear glaze spray. We like this spray for a durable finish. Adults should do the spraying and always follow directions of the product chosen.
Sealing the final ornaments will help stop them from cracking in a few years and prevent moisture from getting in.
What Kind of Paint Should I Use?
I like to use non-toxic acrylic paint for salt dough ornaments. The color will go on much thicker and more vibrant than kids paint. We like this brand of acrylic paint.
How to Decorate
You can use a heart for the shape around the handprints or you can use a circle.
For this one, we used a large heart cookie cutter as the handprints were small (baby handprints):

If you have larger handprints, you can trace around a heart print-out or use a knife (adults only) to draw a heart shape around the handprint.
How Many Ornaments Does this Make?
Depending on the handprint size and thickness of the salt dough – you can get approximately 8 handprints. If you’re using the dough to make small cookie cutter ornaments you’ll get approximately 15.
If you’re hoping to make this for a classroom or with a larger group of kids, I would recommend bringing an extra batch just in case. The quantity can vary depending on size of cookie cutters, handprints and thickness of the dough. I like to roll out the dough and continue to knead together the scraps to use as much as I can.
Tips
- Knead well to make the dough smooth – I like to knead at least 10 minutes.
- Let the ornaments air dry for a day first, if possible. This cuts back on the oven baking time and helps to prevent puffing.
- Don’t forget to flip the ornaments when baking or air drying so that the bottoms will be exposed to air.
- Seal with our recommended sealers mentioned above so that the ornaments will last for many years.
- Store the ornaments in a cool, dry place and keep away from moisture. Sealing the ornaments also prevents moisture from getting in.
- Keep out of reach of pets.

Salt Dough Recipe – for Handprints & Ornaments
Video
Equipment
- Rolling Pin (for rolling out the dough)
- Twine (to create the ornament!)
- Non-Toxic Acrylic Paint (we prefer this brand)
Ingredients
- 4 cups all purpose flour
- 1 cup salt
- 1.5 cups warm water
- Clear Glaze Finish or Mod Podge
Instructions
- Combine all of your dry ingredients and knead for 10 minutes. If your dough is too dry add a little bit more water in (a few table spoons at a time) and continue to knead. The dough should be smooth and roll out with not too many bumps. It should also be easy to press a handprint into it. If it's too hard or dry, then add a little bit more water and continue to knead.
- Roll out the dough to a thickness that you'd like your salt dough ornament to be. We like between 1/4 to 1/2 inch thickness.
- Using a large cookie cutter, cut out different shapes for your salt dough ornaments. If making handprints, place the handprints first and then trace around them.
- Have your child place their hand into the salt dough ornament. If the dough is too hard to get an imprint it may be too dry. Continue to knead until smooth. You can also add in a little bit more water.
- Using a straw, make a hole in the top for where you want to hang your salt dough ornament.
- If possible, let the ornaments air dry for a day.
- Preheat your oven to 250 degrees Fahrenheit. Bake for 1-2 hours. If your ornaments are still doughy, put back in for another hour. (It will depend on your thickness how long you need to bake for. The thinner ornaments will take less time but thicker may take more).
- If you encounter too much puffing, roll out thinner ornaments and this will help reduce the puffing. If the ornament is still a bit doughy, bake for longer or let sit out a few days to harden before decorating. The thickness of the dough will determine how long you have to bake them for. We prefer to bake them at 250 degrees Fahreneheit for longer and let them air dry for a few days to prevent puffing.
- Once cool, you can decorate by painting with non-toxic acrylic paint.
- Spray with a clear glaze finish or finish with mod podge. Do this before adding the glitter.
Kids will love helping to make this salt dough recipe. They will also have fun decorating the salt dough ornaments by painting them.
Finally, just a friendly reminder to keep these out of reach of pets (they can be toxic to dogs due to the salt content).


So could you cut the recipe in half if you don’t want to make as many?
Definitely!
So I made these with my kids on saturday, we only did the dough, handprints and baked in the oven. The middle was still doughy so I baked for 3 hours. I thought they would dry out the rest of the way and I just checked them and they are more doughy than they were on saturday, I guess I shouldn’t have stacked them on top of each other. I just put them back in the oven with a higher temp. I really hope this works, we are decorating them on Wednesday with paint but I was hoping to get the glitter on them tonight.
Can it be painted with spray paint to seal it?
You can paint with spray paint but I’d still recommend using a sealer on top. Hope that helps!
Need Help! So I made some handprints….I think my dough is a little too think. The top of them look great! But when I flip them over…doughy in the middle. I tried tuning them over and baking them for a couple hours lingers but isn’t working! Should I just let them air dry?? I just don’t want to ruin them! The handprints look great! Any thoughts on what to do??
Julie – pop them back in the oven for another hour or two and if still not dry, let them air dry for a few days and they will harden up. Then you can seal once completely dry through.
What temperature should you bake?
Hi Nicole at 200 Fahrenheit. Full instructions are above. 🙂
Can you add fragrance to the dough maybe gingerbread smell or cinnamon
Hi Debbie – we haven’t tried that. But you could test a few and see how they turn out!
Hiya do u add glue to the mixture or coat with glue after then bake
Dilute pva glue with some water and coat after baked and completely dried through (in order to seal out the moisture).
Hi can you use pva glue to seal them
Yes you can just make sure you dilute it with a bit of water.
I tried doing it with my daughter and the dough just stuck too her hand
If it’s too sticky you can just grab a little bit of extra flour and put it on your surface or your hands when working with the dough.
Same with my 8 week old. What I did was dust flour on top of the dough before putting my daughters hand in it. Peeled off perfectly. I didn’t think of this until about the 8th attempt
I used this recipe once and made the most adorable heart shaped “cookie” ornaments…without the string. After baking, I painted them dark brown to look like choc glaze and “drizzled” with ivory acrylic paint and then glittered with clear glitter. My husband thought they were real cookies! Lol! That was several years ago, they still look great and I use them to accent a candle in a cute cocoa mug. Adorable!
could you spray them with hair spray?
Spray with hair spray to seal the glitter on if you’d like but you’re better off using the acrylic sealer on the whole thing to protect the salt dough from cracking.
How many do you bake at one time?
Hi Stephanie – there’s no limit to how many you can bake at once. Just as many as you can fit on a baking sheet. 🙂
I can use this for decoration ?
Hi Grace – yes you can put on the Christmas tree or hang anywhere you’d like 🙂
how about putting in the dehydrator, that way you could do lots at a time?
We haven’t tried that Sheila but give it a try and let us know how it goes!
If you make them for a classroom, could you make them in class and take them home to back later in the day, or do they need to be baked right away?
Hi Kara, We’ve been told you can air dry clay so it should be fine. We would just recommend wrapping in some clear wrap and then put in a container so it doesn’t get smushed.
Do these last long?
They should last quite awhile if baked. You could always add some extra mod podge around the paint to prevent any flaking too. 🙂
Hey Kim!! My children made these absolutely years ago and I’ve hung them on our Christmas tree every year!! The “kids” are now 33, 30, & 28 years old!! So they can last a very long time!!!
Can I make the dough the night before and keep it in a ziplock bag until tomorrow morning?
Hi Ally – I haven’t done that before but I think it would be fine. You could put it in the fridge to keep overnight and that may help!
Thanks!
Is it possible to just put it in a toaster so that it can bake faster?
A toaster oven should work but not a regular toaster. You want the print to lay flat.
What kind of glue did you use for glittering?
Hi Janette – just regular white tacky glue will do the trick! 🙂 Be sure to let it dry and you can also spray it with a bit of hair spray so that the glitter doesn’t fall off after.
If you don’t have eathier mod podge or clear coating what can I use
Alicia- you can also dilute some white pva glue that dries clear and seal with that.
Do you think this would air dry? I would love to do this in the classroom but it would be hard to get them into an oven right away. Is have to take them home and bake them. Thank you for sharing this adorable project!
Hi Lynn
You do need to bake them. However you could do the hand imprints and send them home with instructions to bake! Hope that helps!
Teachers check with the cafeteria before hand to see if you might use one of the ovens and when. A lot closer than taking them home, also less risk in getting damaged.
Hi! I plan on making 26 ornaments any idea as to how much Flour and salt I will need?
Hi Kelley,
You may be able to do only 2 batches depending on the size of your cookie cutters and the thickness you make them. You may want an extra batch handy though just in case!