

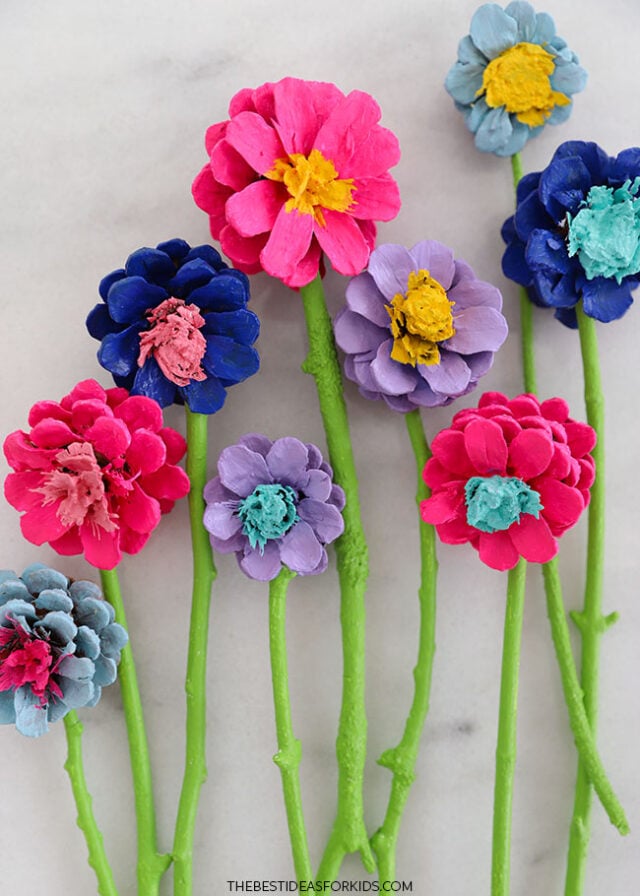
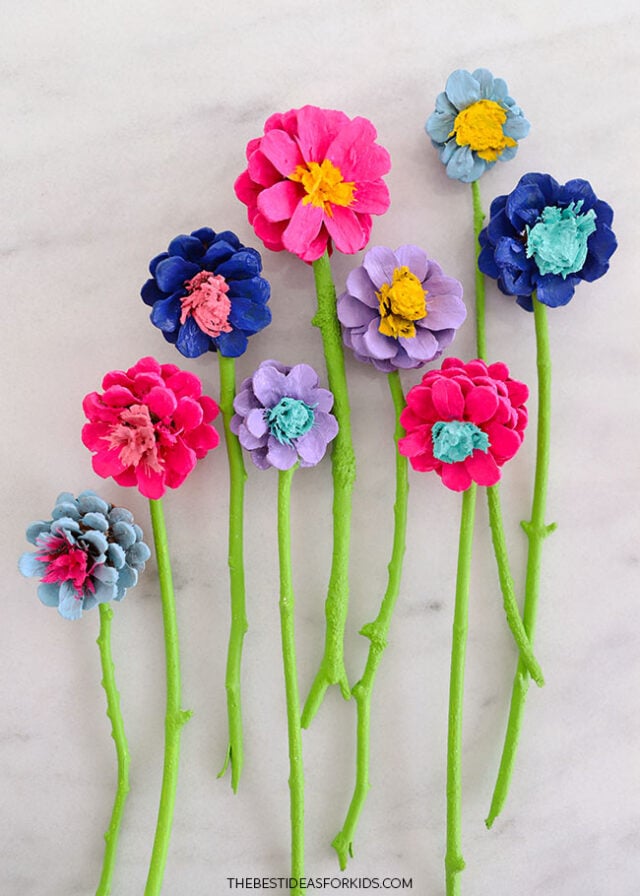
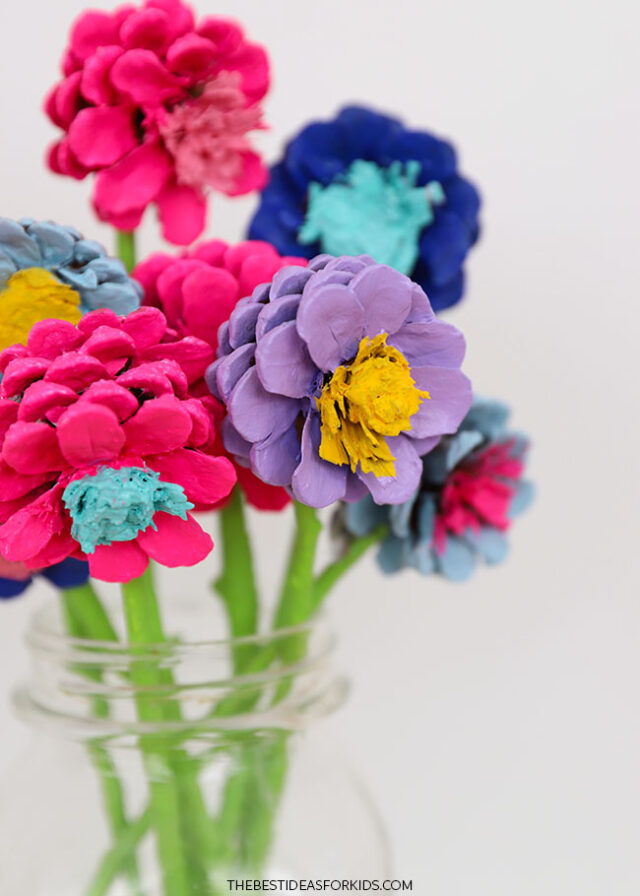
Turn pine cones into these handmade flowers with some paint and creativity! Gather up pine cones from your yard or local park and save them for this fun and simple nature craft. These also make a great gift idea!
RELATED: Pine Cone Wreath
Use garden snips or pruners to cut the tops off of the pine cones before painting. Since the snips are very sharp, this step must be done by an adult. Once the pine cones are cut, kids will love mixing and matching paint colors to create a beautiful bouquet of pine cone flowers.

We also used sticks that we collected outside for the flower stems.

Painted Pine Cone Flowers
When collecting pine cones, look for a variety of sizes so that you will have different-sized flowers. This is the perfect opportunity to go on a nature scavenger hunt and see how many you can find! If you find different varieties you can save them for other pine cone crafts.
If you make a bunch of pine cone flowers you can put them together to make your own pine cone bouquet. This makes a beautiful gift for a birthday or Mother’s Day!
Supplies Needed
- Pine cones – a variety of sizes. Go on a nature walk to collect them or you can get them from Amazon or find them usually at the dollar store.
- Sticks – about 10″ long without any loose bark
- Paint – green for the stems and various shades for the flowers
- Paintbrushes – medium-sized
- Hot glue gun – used with adult assistance
- Garden snips/pruners – for adult use only
Note on Cutting Pine Cones
We strongly recommend using garden snips for cutting the pine cones. Depending on your pine cone and your scissors, you may be able to make it work with scissors, but we found they weren’t nearly strong enough to cut through the pine cone.
Watch the Video Tutorial
How to Make Pine Cone Flowers
1. Prepare the pine cones.
Once you’ve collected pine cones from outside, bring them inside and place them on a parchment-lined baking sheet. Bake in the oven at 250F for about 20 minutes, keep a close eye on them. The heat will help dry them completely, get rid of any bugs that may have been on them, make any sap melt away, and also open them up as much as possible. Adults will need to do this part.
Once completely cooled, gently tap the pine cones on a table – this will loosen the papery leaf-like seeds inside.
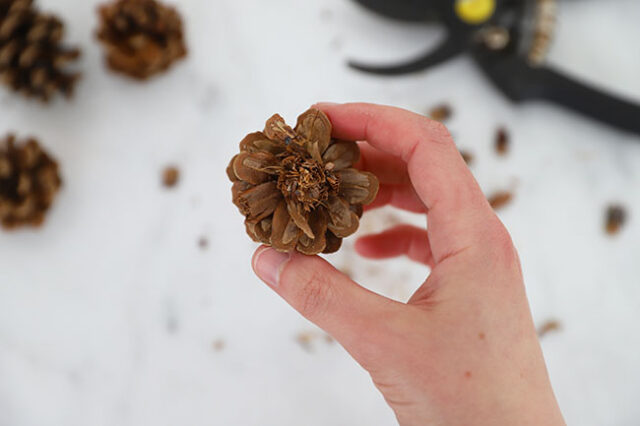
To trim the pine cones, you will want to use garden snips or pruners – this step must also be done by an adult. Hold the pine cone in one hand and hold the pruners in the other. Find a spot between the pine cone scales where the pruner blades can fit, about half-way to two-thirds of the way up from the base.

Squeeze the pruners’ handles to cut, twisting the pruners to cut through the tough center if needed.
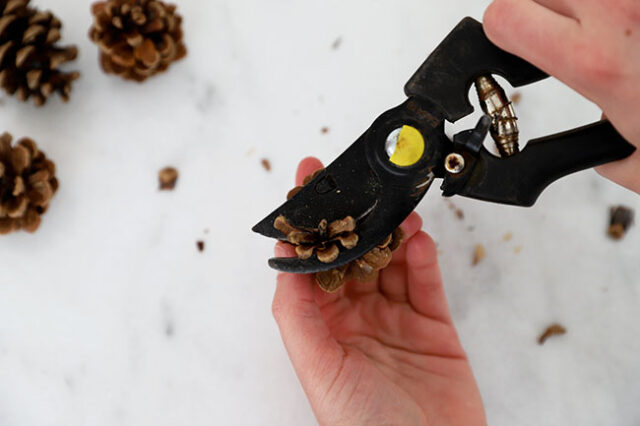
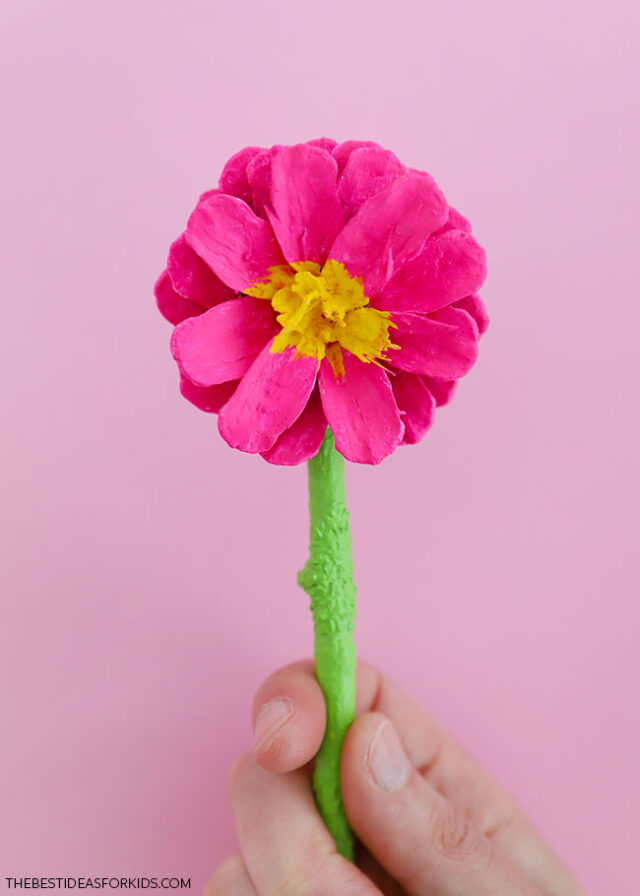
Cut and twist until the top of the pine cone is removed. When completely cut, the pine cone should resemble a flower, with a slightly frayed center. Repeat for as many pine cones as you’d like.
2. Paint the pine cones.
Apply a coat of paint onto the pine cone scales. As you do this, you may notice that seeds may stick to your paintbrush – just wipe them off your brush on a scrap of paper, if needed.
There are a lot of nooks and crannies on pine cones, but don’t worry about painting every single spot. You can always let the first coat dry and come back later to do touch-ups on any spots you missed.
Depending on your paint, you may need to do a couple of coats to get good coverage. To make pale or neon colors extra bright and vibrant, apply a coat of white paint as a primer and let dry completely before applying a coat of colored paint. Allow to dry completely.
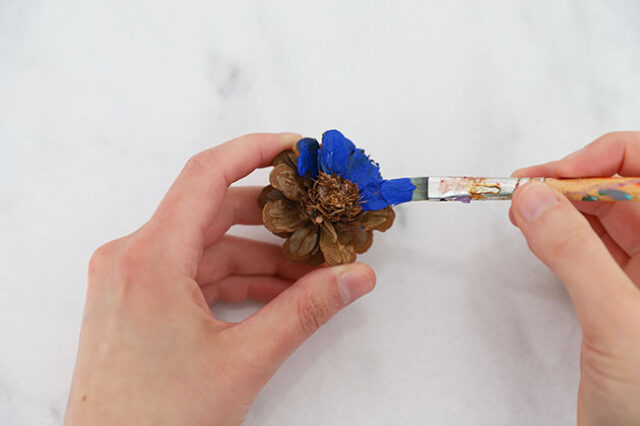
Paint the center in a contrasting color, and set aside to dry.

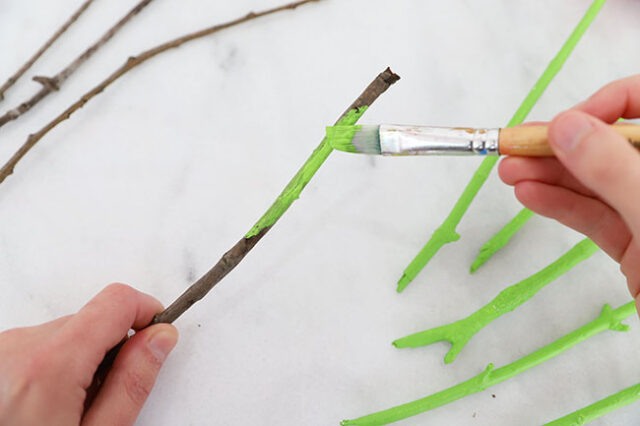
3. Paint the stems.
Trim your sticks to the desired length – we used sticks about 10″ long, but you can use any length you’d like, especially if you have a specific jar or vase in mind for the flowers.
Apply a coat of green paint onto the sticks and set aside to dry.
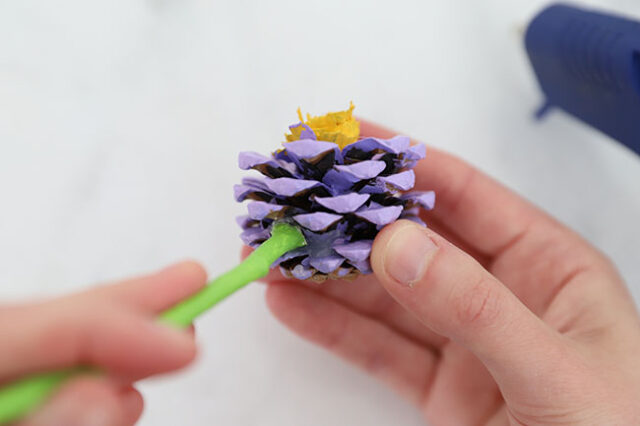
4. Assemble the flowers.
With adult assistance, apply hot glue to one end of the painted stick. Insert the stick into the side of the pine cone between the scales, pressing and holding it in place until the glue dries and feels secure.
Make a bunch of flowers and turn them into a pine cone bouquet!
Arrange them in a jar or vase as decoration for any time of year of give it as a gift.


Share a Comment!
We LOVE hearing from you! Submit your question or comment here.
Your email address will not be published.
Required fields are marked *