

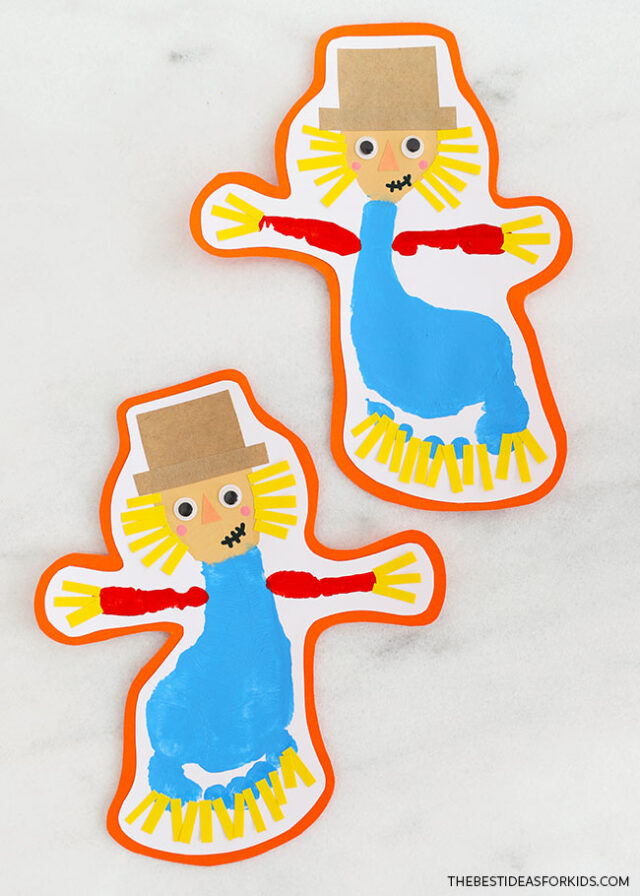
Get ready for fall by making a Footprint Scarecrow! This craft is a fun way to make a fall-themed keepsake using your child’s foot and fingerprints.
RELATED: Fall Crafts for Kids
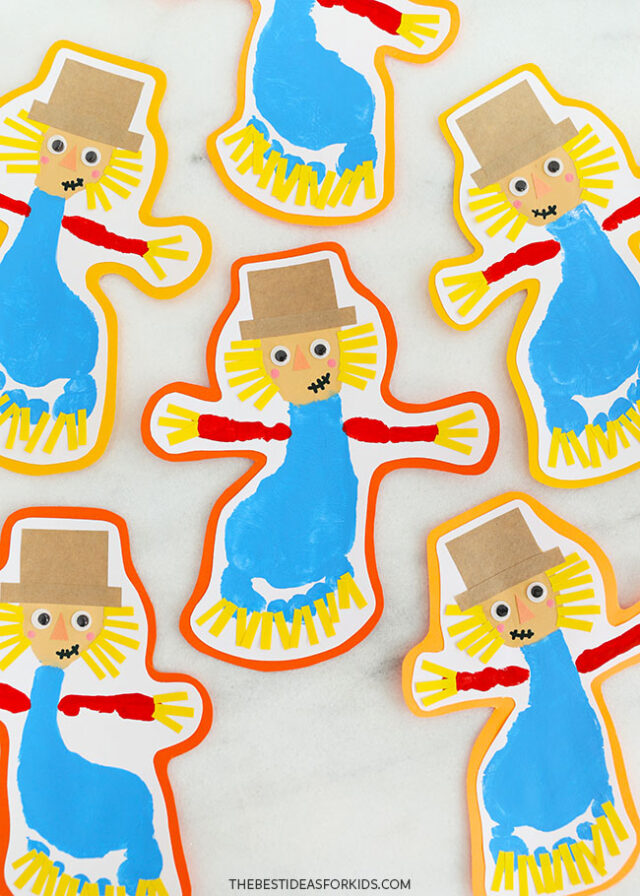
Once the scarecrow’s body is stamped, kids will love helping to attach the little pieces of straw to make him look like a scarecrow!
To try a painted handprint instead, see our handprint scarecrow.
Tape them up on your walls as fun fall decorations, or even attach them onto a string to form a quick garland that you can hang year after year.
Supplies Needed
- Paint – non-toxic tempera paint in blue, red, light brown, and pink
- Paintbrushes – medium sized
- Scissors
- White cardstock – for stamping the footprints on
- Colored paper – yellow for the straw, orange for the nose, and more shades of orange for backing
- Brown paper bag – or brown kraft paper, for the scarecrow hat
- Glue stick
- Black marker – to draw the scarecrow mouth
- Googly eyes – 2 per scarecrow
- Printable templates – found at the bottom of the post
Watch the Video Tutorial
How to Make a Footprint Scarecrow
1. Make the footprints.
Before you begin painting, set up your space. We like to have the child sit on a low chair or stool, and stamp their foot onto paper on the floor. Gather a few paper towels or baby wipes, and a bowl of warm soapy water to help wash the paint off when you are done stamping.
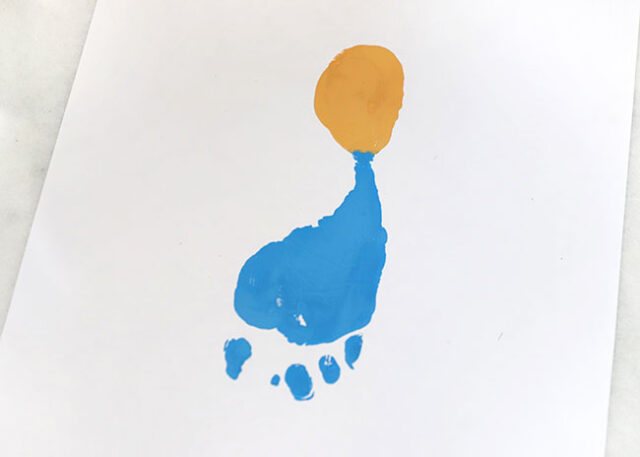
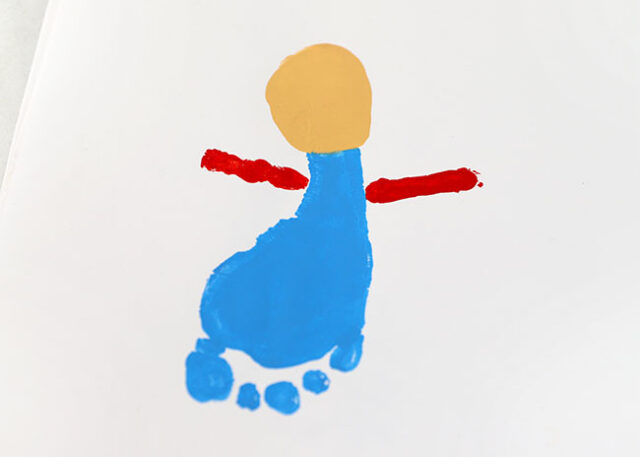
Once you’re set up, apply light brown tempera paint onto the heel of your child’s foot, forming a circle.
Then use blue tempera paint to cover the rest of the foot, from the bottom of the brown circle down to your child’s toes.
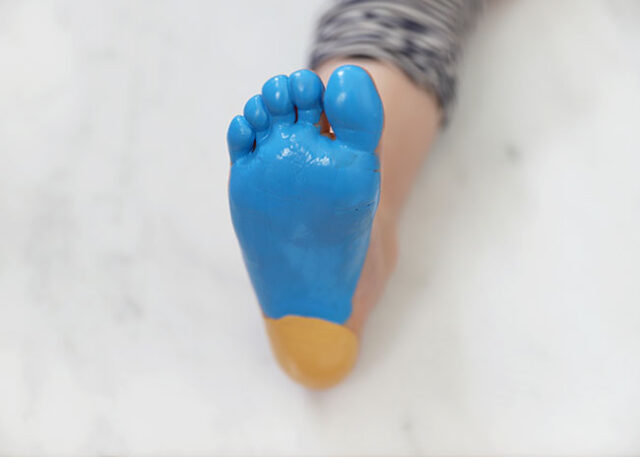
Guide your child in stamping their foot onto a piece of white cardstock.

Set aside to dry and repeat on additional pages, applying more paint between stamps. When you have as many footprints as you’d like, help your child wash and dry their foot.
2. Stamp the arms.
Apply red tempera paint onto your child’s finger.

Guide them in stamping their finger beside the blue area of the footprint, just below where the brown paint begins.
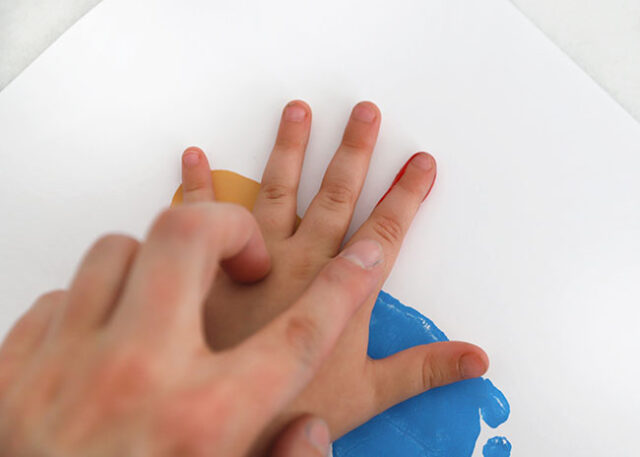
The stamped finger will form the scarecrow’s first arm.

To stamp the second arm, reapply paint onto the same finger, and stamp onto the other side.
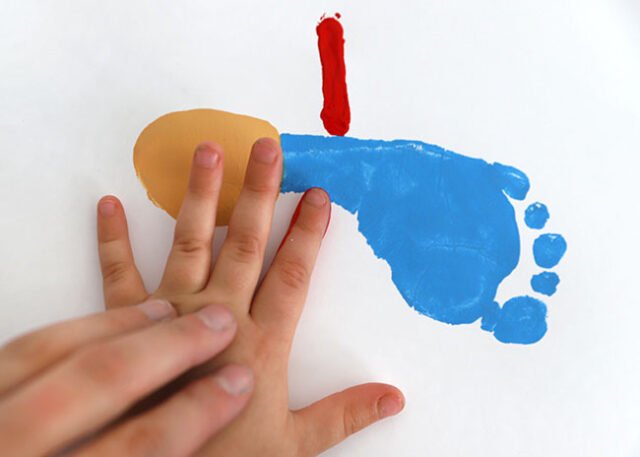
Set aside to dry.
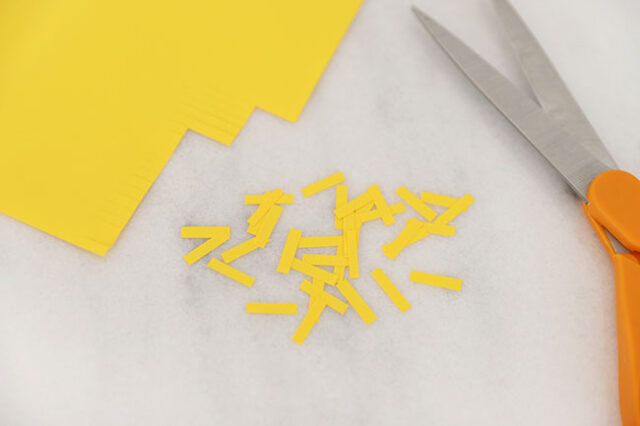
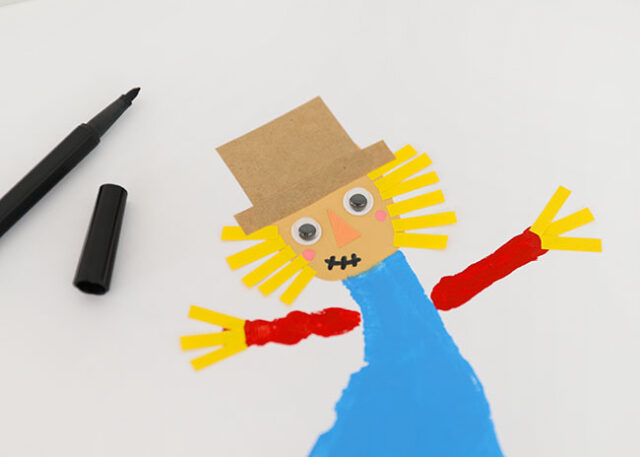
3. Make the straw details.
Cut a piece of bright yellow paper into small strips, about 1/8″ wide and 1/2″ long. The pieces do not need to be the same size or length – this will add variety to the scarecrow.
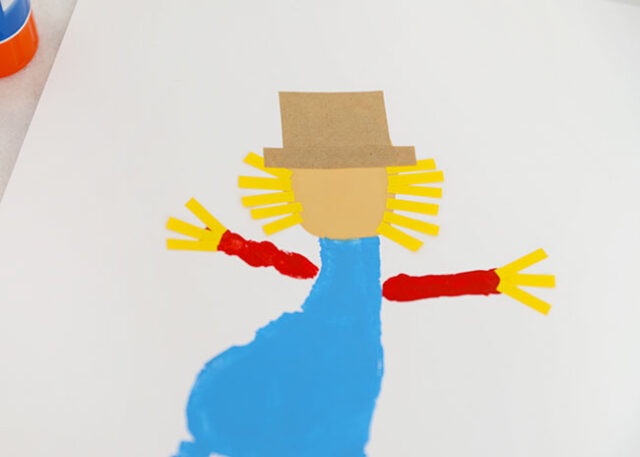
Use a glue stick to apply glue along the bottom of the toes, the end of each finger-stamped arm, and on both sides of the face. Then glue the yellow pieces of straw onto the glue. Do this one area at a time so that the glue doesn’t dry before you’re ready.

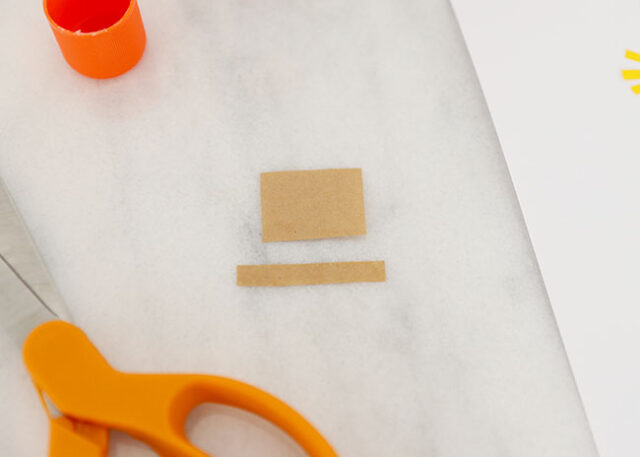
4. Make the scarecrow hat.
Print out the free template (found at the bottom of the post) and cut out the shapes. Trace the 2 rectangles onto a brown paper bag and cut out. You’ll need 1 of each rectangle per scarecrow.
Glue the big rectangle onto the scarecrow’s head, so that it is just above where the straw hair starts. Then, glue the narrow rectangle on top, forming the hat brim.
5. Make the scarecrow’s face.
Glue on 2 googly eyes and a small triangular nose cut from orange paper (use the printable template as a guide, if needed).
Use a black marker to draw on a smile, with a few stitches through it. Then use the end of a paintbrush to make small pink dots as rosy cheeks.
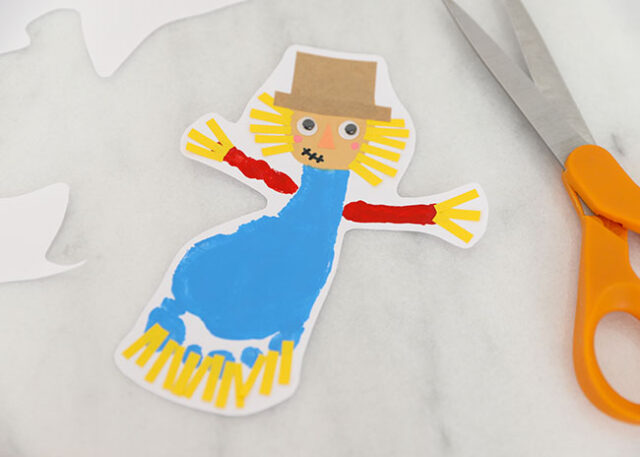
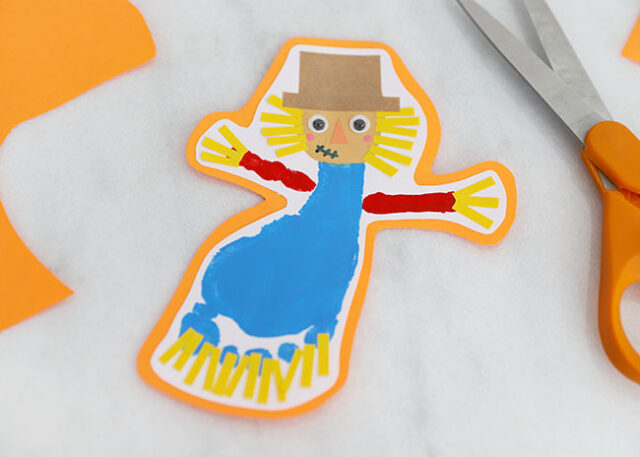
6. Add the backing.
Once the pink rosy cheeks are dry, use scissors to cut out around the scarecrow, leaving a border of about 1/4″.
Apply glue onto the back of the scarecrow and press onto a sheet of colored paper – we used a few shades of orange.
Cut out the scarecrow, leaving another 1/4″ border of colored paper showing.
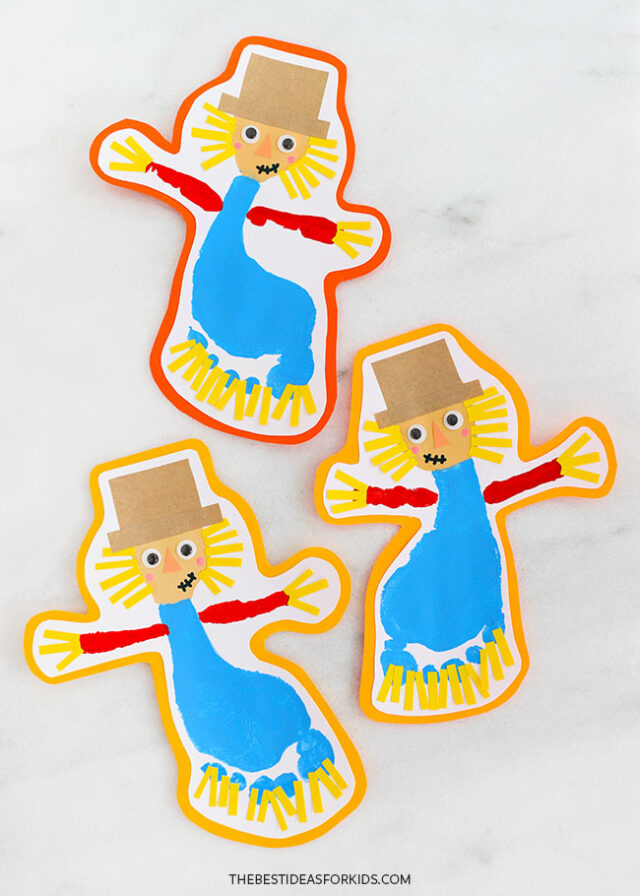
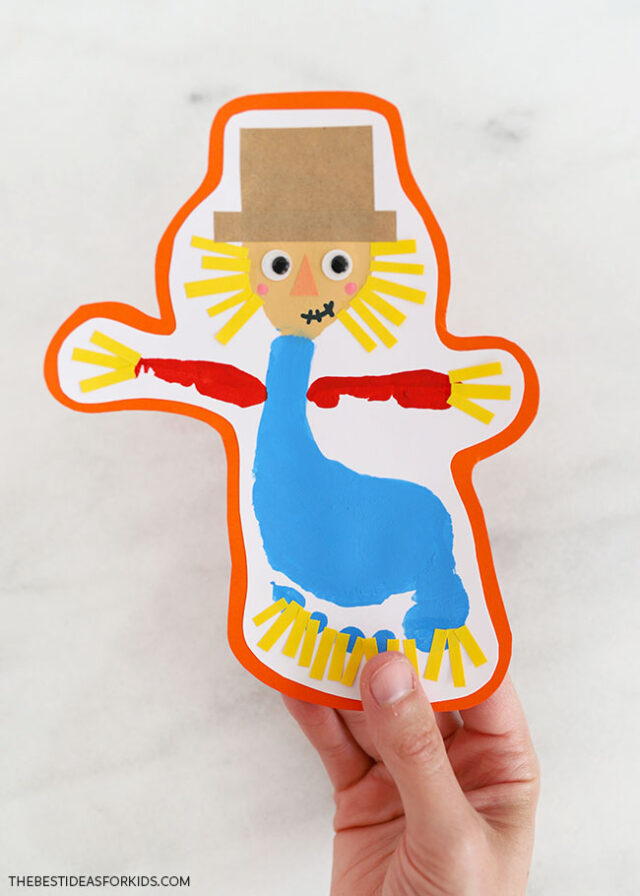
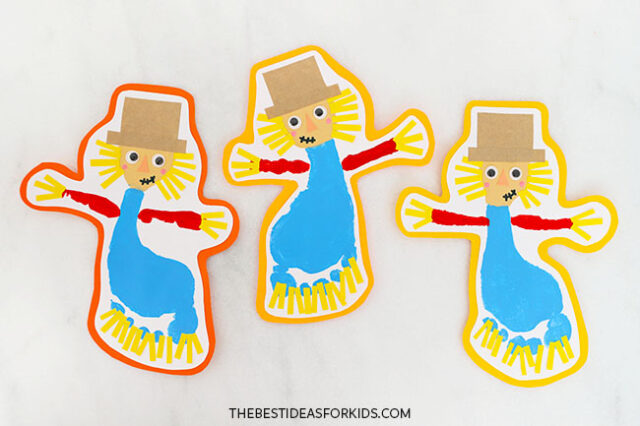
You footprint scarecrow is now complete!
Make one or make a bunch and turn them into a scarecrow banner for Halloween decoration.
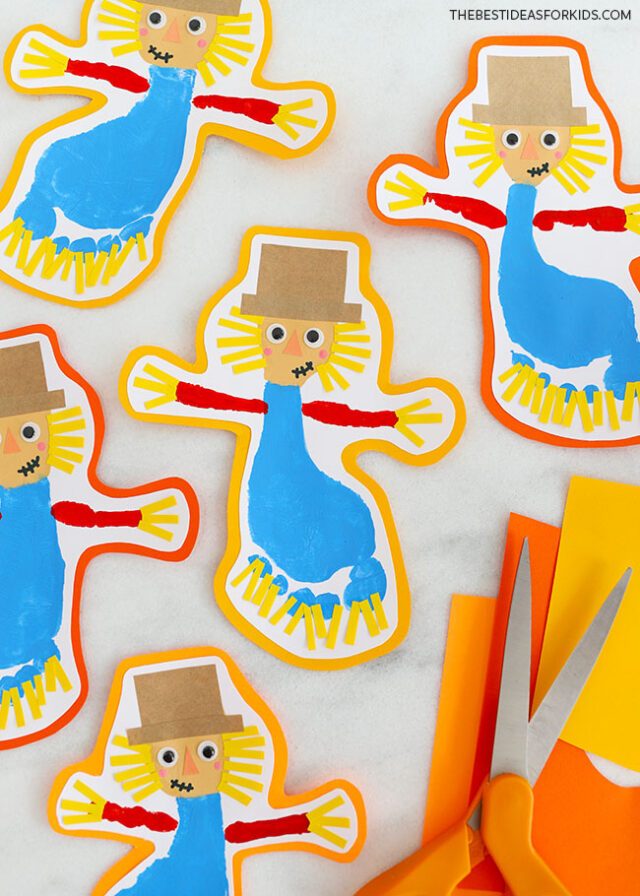
Don’t forget to write your child’s name and the date on the back of each one!


Share a Comment!
We LOVE hearing from you! Submit your question or comment here.
Your email address will not be published.
Required fields are marked *