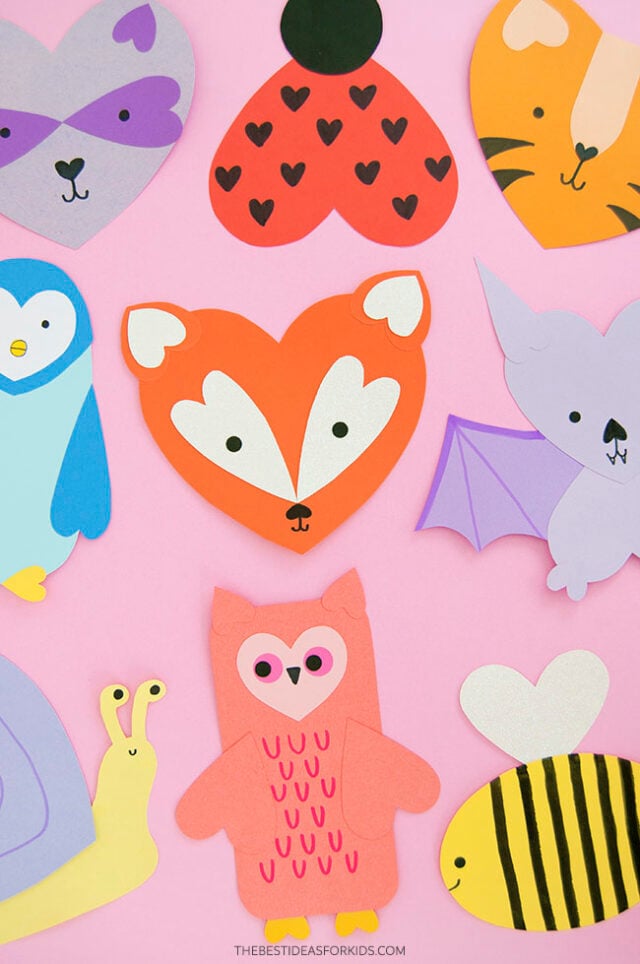
Valentine’s Day is right around the corner – so let’s make a whole zoo of heart animal crafts! Using colored paper, markers, scissors, and glue, these playful heart-shaped animals are fun to celebrate Valentine’s Day.
RELATED: Valentine Ladybug Craft
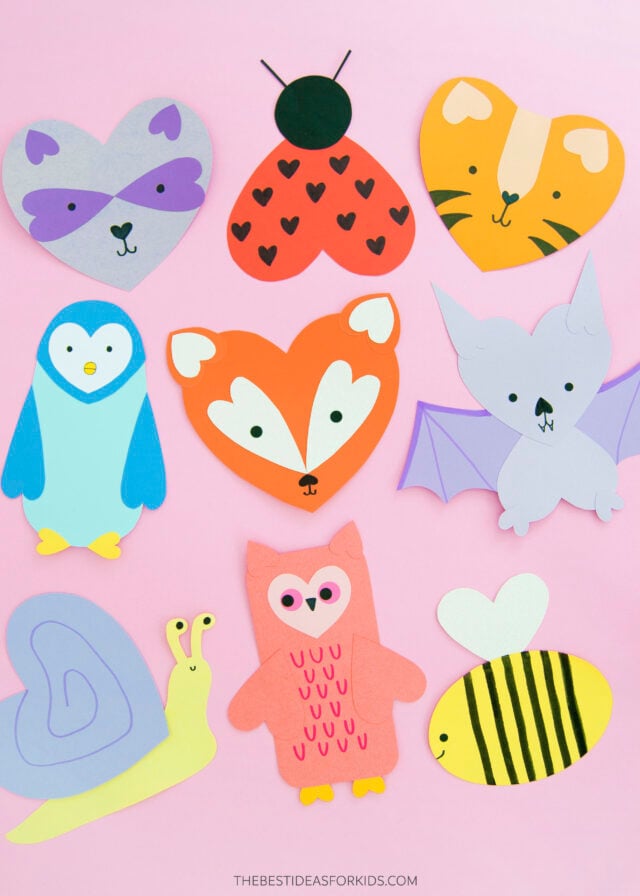
Heart-Shaped Animal Crafts
These animals are not only a fun activity for kids, but the finished products can be hung up as Valentine decorations, or even strung together as a garland!
We’ve included all the templates needed for each animal, so there’s no guesswork involved. Just print, cut, trace, and assemble!
Get the free printable templates at the bottom of the post.
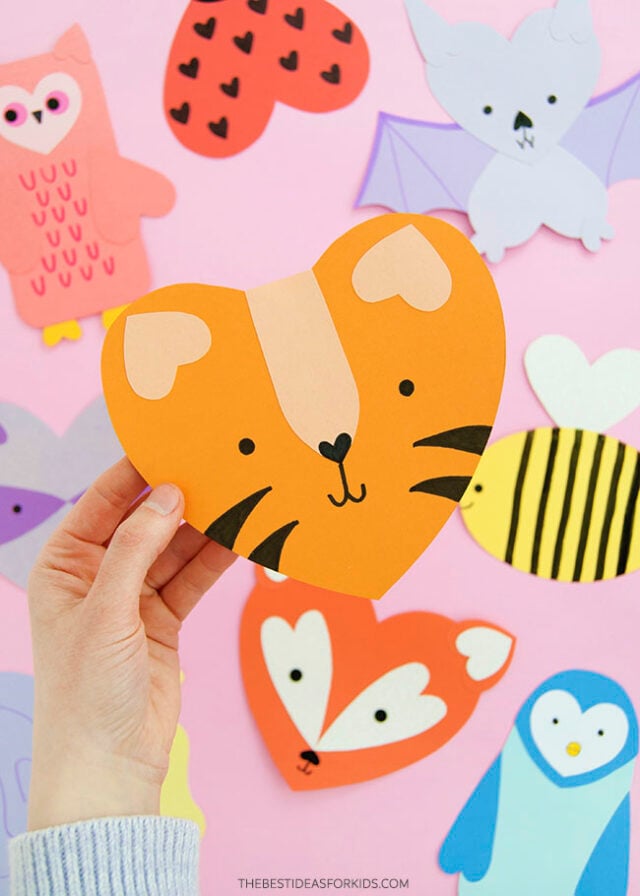
We decorated these paper heart animals with markers, which is a great way to keep the project mess-free. Stickers, paint, or even tempera paint sticks would also work as alternative ways to add fun details to the animals.
You can even use googly eyes or pom poms to add more features to them.
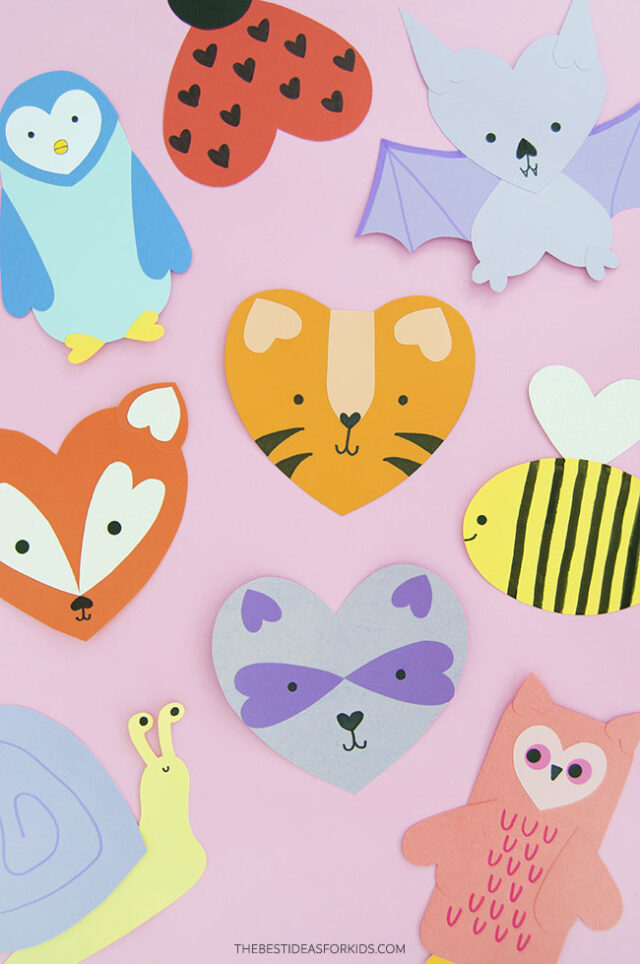
Supplies Needed
- Printable templates – get the free printable templates at the bottom of the post
- Scissors
- Colored cardstock – different colors in a few different shades (light purple, purple, yellow, orange, dark orange, light blue, dark blue, black, white and pink.
- Glue stick – for assembling the animals
- Markers – black plus other colors (pink, purple), for adding faces and details. A thin marker and a regular black marker.
- Pencil and eraser – for tracing the templates
- Round stickers – 5/8″ pink office stickers for the owl’s eyes (optional)
- Hole puncher – a larger hole punch (3/8″ holes) for the fox and owl eyes. Alternatively, you can draw the eyes on.
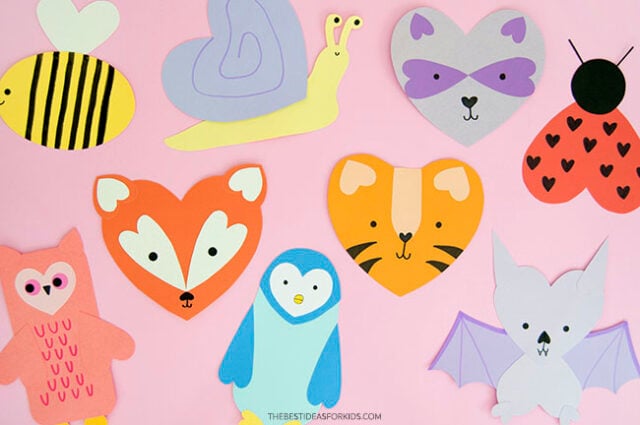
Watch the Video Tutorial
How to Make Paper Heart Animals
There are 9 different heart-shaped animals included in this post, see each tutorial below.
Fox
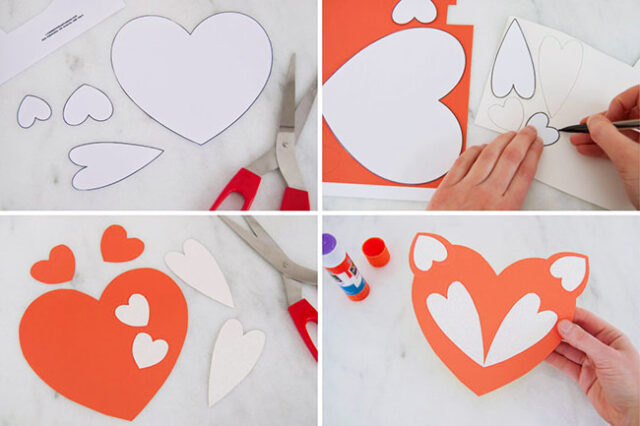
1. Print and cut out the fox template. Get the heart templates at the bottom of the post.
2. Trace the pieces onto paper. On a slightly more reddish/orange paper, trace 1 face and 2 outer ears. On white paper, trace 2 eyes and 2 inner ears.
3. Cut out all of the pieces.
4. Glue the inner ears onto the outer ears, and then glue both ears onto the face.
Next, glue the 2 eye details onto the face so that the points of the hearts are just touching.
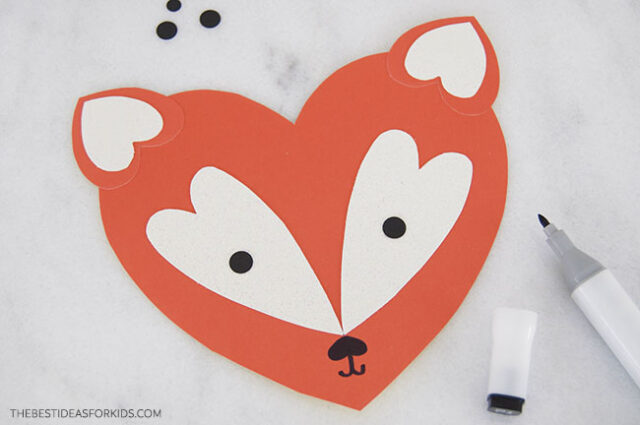
5. Use a black marker to draw an upside-down-shaped heart as the nose with a little mouth under it.
Draw on the eyes with a black marker or use a hole puncher to punch black circles and glue them on.
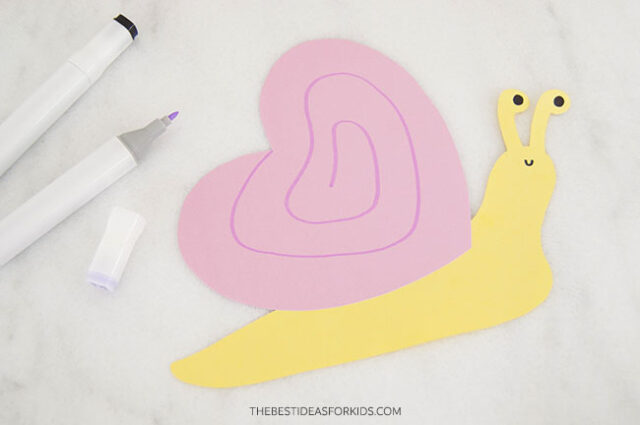
Snail
1. Print out the snail template and cut out the pieces. Get the heart templates at the bottom of the post.
2. Trace the heart onto whatever color you would like the shell to be and trace the snail’s body onto any contrasting color.
3. Cut out both pieces.
4. Use a glue stick to attach the heart to the back of the snail’s body.
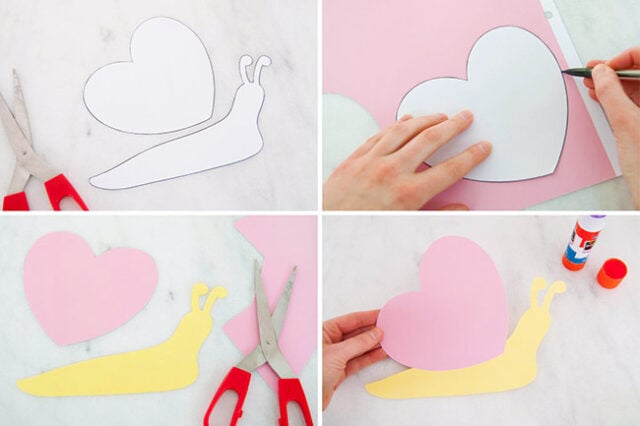
5. Use a black marker to draw on the snail’s eyes and mouth. Draw the snail shell swirl with a color similar to the shell color.
Penguin
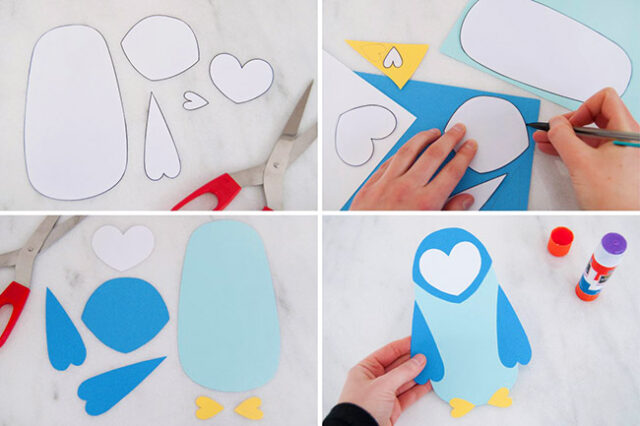
1. Print and cut out the penguin templates. Get the heart templates at the bottom of the post.
2. Trace 1 head and 2 wings onto a darker blue paper. Trace 1 body on light blue paper and 1 face onto white paper. Finally, trace 2 feet onto yellow paper.
3. Cut out all of the pieces.
4. Use a glue stick to attach the head onto the top of the body and the 2 wings to the sides.
Attach the face onto the head and the 2 feet to the bottom of the body.
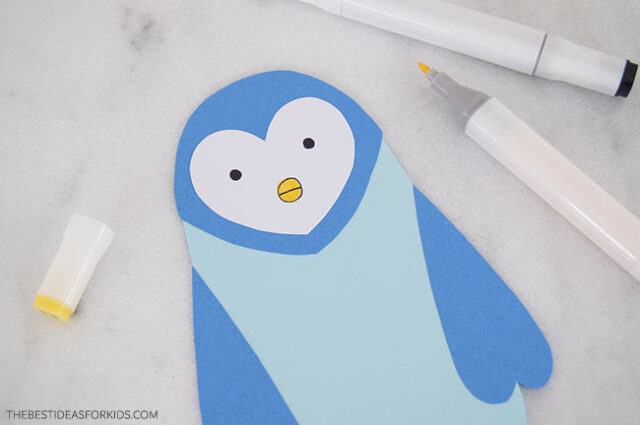
5. For the face details, draw a yellow circle for the beak and outline it with a thin black marker or pen. Use a regular black marker to draw the 2 eyes.
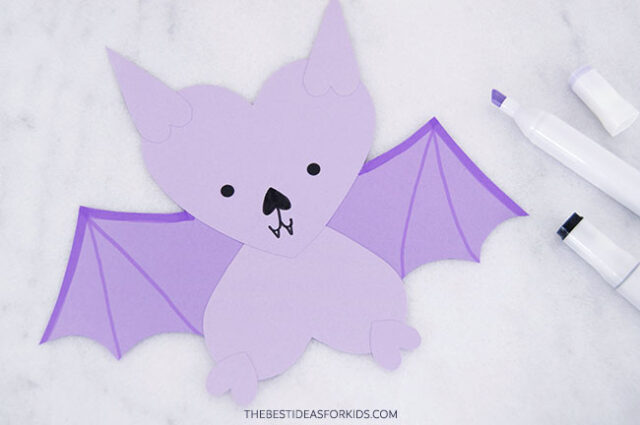
Bat
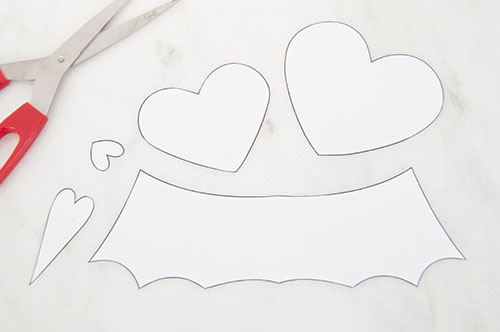
1. Print out the bat template and cut out all of the pieces. Get the heart templates at the bottom of the post.
2. Trace 1 wing piece onto a darker shade of purple. Trace everything else (1 head, 1 body, 2 ears, and 2 feet) onto a lighter shade of purple.
3. Cut out all of the shapes.
4. Glue the 2 ears to the top of the head and glue 2 feet to the bottom of the body.
5. Glue the head and body pieces together.
6. Glue the wings behind the body.
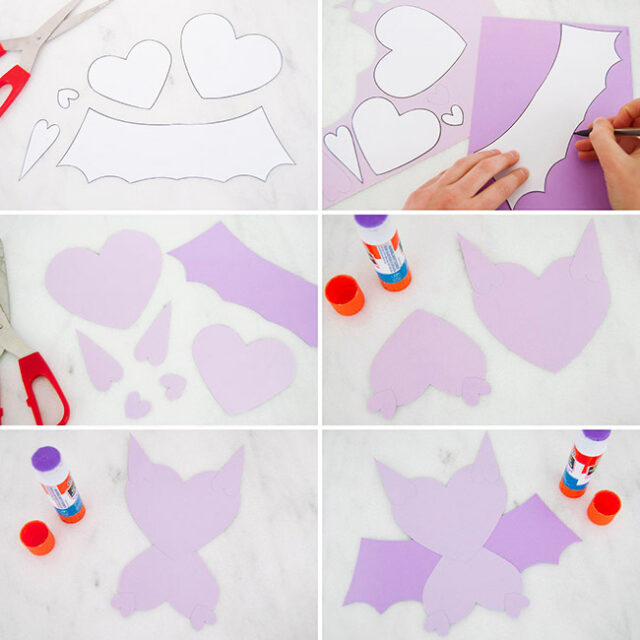
7. Use a black marker to draw 2 eyes, an upside-down heart for the nose, and a little mouth with fangs.
Draw details onto the wings with a purple marker.
Ladybug:
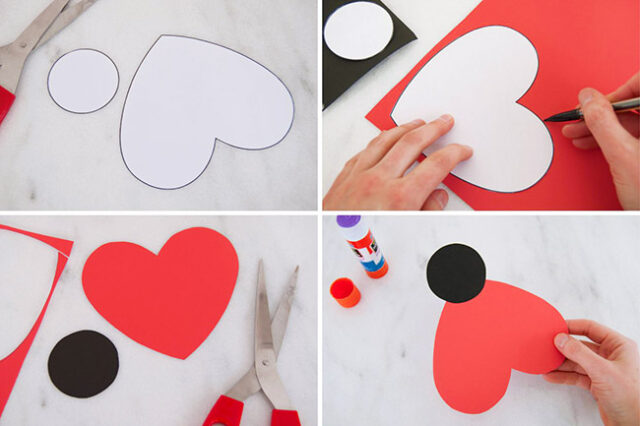
1. Print out the ladybug template and cut out the pieces. Get the heart templates at the bottom of the post.
2. Trace 1 body onto red paper and 1 head onto black paper.
3. Cut out both pieces.
4. Use a glue stick to attach the head onto the body so that it just overlaps the point of the heart.
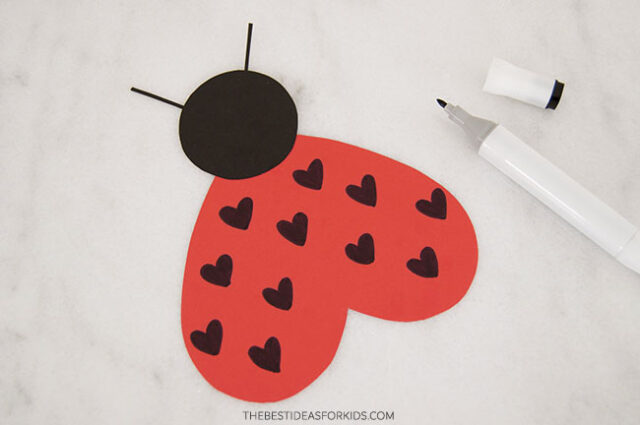
5. Use a black marker to draw little hearts all over the red body for the ladybug’s spots. Cut 2 very thin strips of black paper and glue them to the head as antennae.
Raccoon
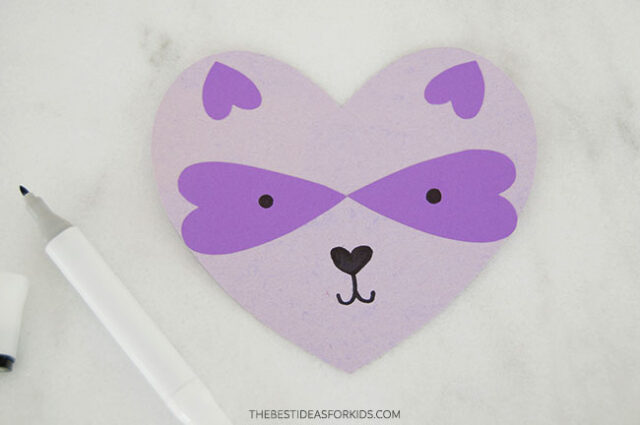
1. Print out the raccoon template and cut out the pieces. Get the heart templates at the bottom of the post.
2. Trace 1 head onto light purple paper and trace 2 eyes and 2 ears onto dark purple paper.
3. Cut out all of the pieces.
4. Glue the two ears onto the top bumps of the heart.
Glue the two eyes onto the middle of the heart so that the two points meet in the center.
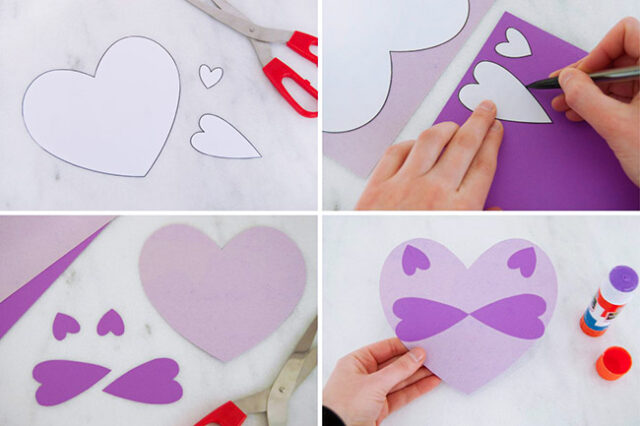
5. Draw the eyes, a heart-shaped nose, and a little mouth with a black marker.
Owl
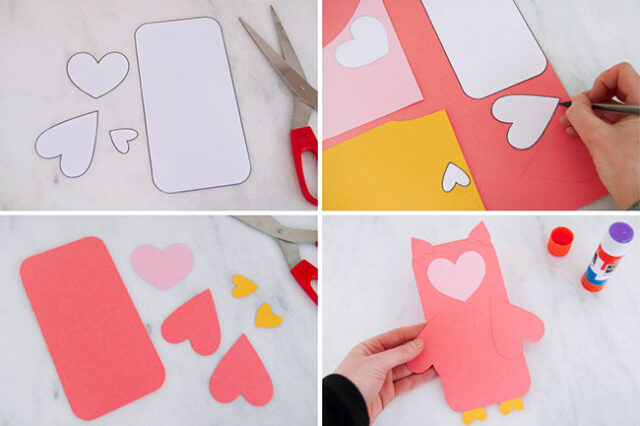
1. Print out the owl template. Cut out all the pieces. Get the heart templates at the bottom of the post.
2. Trace 1 face onto light pink paper and 2 feet onto yellow paper. On dark pink paper, trace 1 body, 2 wings, and 2 ears.
3. Cut out all of the pieces.
4. Use a glue stick to attach the 2 ears to the top of the body so that the hearts point up.
Attach the 2 heart feet to the bottom of the body so that the heart points are hiding behind the body.
Glue the face just below the ears and attach a wing to each side of the body.
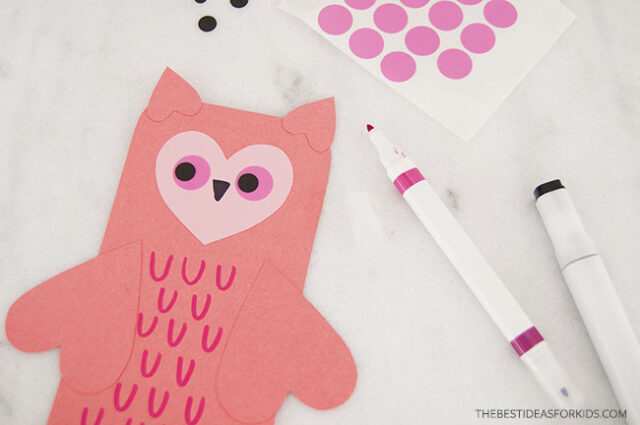
5. Attach 2 pink circle stickers onto the face as eyes and 2 black stickers (or hole-punched circles from black paper) on top. If you don’t have stickers, you can draw the eyes on with pink and black markers.
Between the 2 eyes, draw a beak with a black marker.
On the owl’s body, use a pink marker to draw U-shaped feathers.
Bee
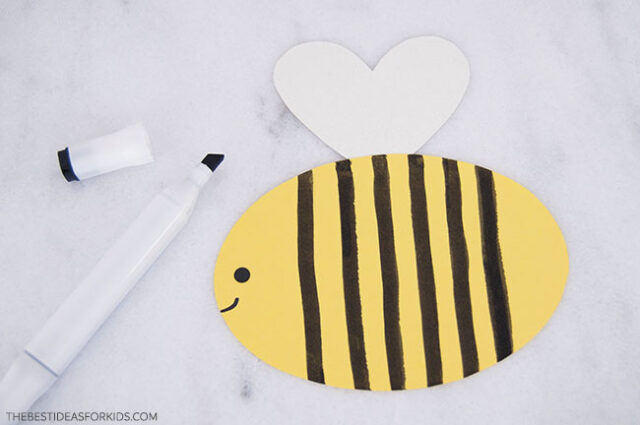
1. Print out the bee template and cut out the pieces. Get the heart templates at the bottom of the post.
2. Trace the body onto yellow paper and the wings onto white paper or cardstock.
3. Cut out all of the pieces.
4. Use a glue stick to attach the wings to the body so that the point of the heart is just hiding behind the body.
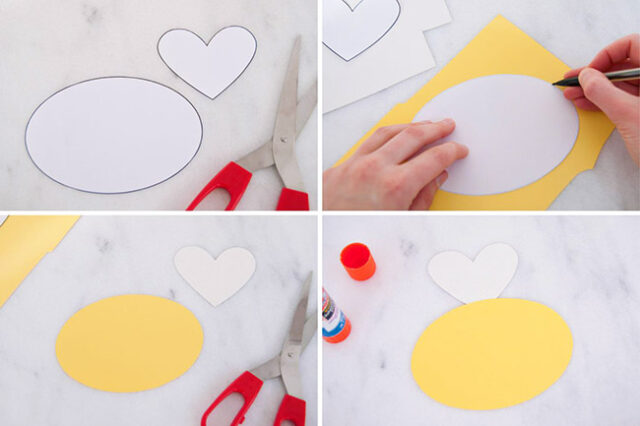
5. Use a black marker to draw stripes on the bee’s body, as well as an eye and mouth on one end.
You can also glue strips of black paper to the bee.
Tiger
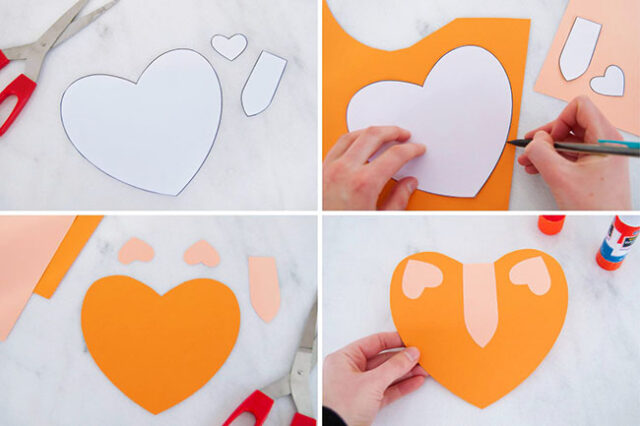
1. Print out the tiger template and cut out the pieces. Get the heart templates at the bottom of the post.
2. Trace 1 head onto orange paper. On peach paper, trace 1 snout and 2 ears.
3. Cut out all the pieces and erase any pencil lines that may be visible around the edges.
4. Use a glue stick to attach the two ears to the top bumps of the face heart so that they point up. Glue the snout to the center of the face heart.
5. Use a black marker to draw stripes onto both sides of the face, as well as 2 eyes, a heart-shaped nose onto the snout, and a small mouth.
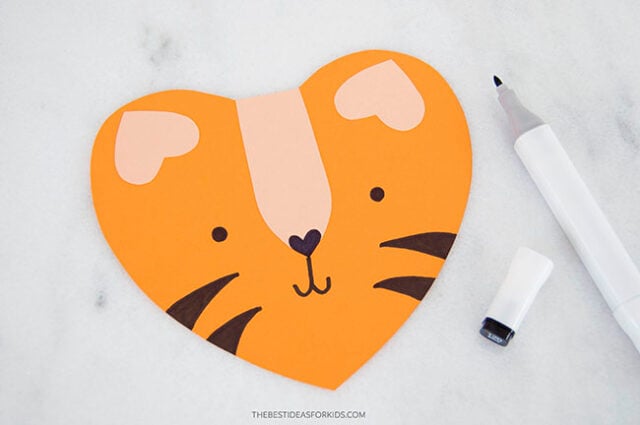
These finished paper heart animals are so cute – if you can bear to part with them, turn them into cards and write a little Valentine’s Day note on the back of them.
Get the Free Printable Heart Templates Here
Get the Free Printable Heart Templates
Get all 9 FREE printable heart templates delivered to your inbox. You’ll also receive our free weekly newsletter.
Already a subscriber? Don’t worry you won’t be subscribed twice! We do not share or sell your personal information. Read our privacy policy here. This form collects information we will use to send you our newsletter with latest posts and special offers.




Share a Comment!
We LOVE hearing from you! Submit your question or comment here.
Your email address will not be published.
Required fields are marked *